Support Articles
Bitesize Bugs
Some bugs are determined by the maintainer of Pop! projects to be easy to fix, these bugs are referred to as "bitesize" bugs and will show up in the project's issue tracker as such.

The bitesize bug badge exists on the right side of the project's issue tracker. New contributors should look for these for an easy bug that they can tackle in an hour or two. Experienced contributors can grab these if they want something they can knock out quickly when they are short on time.
Solving these bugs often contributes to better polish for the overall project. Alone, these bugs may seem small, but when you add them up they vastly improve the quality of the platform. They also offer an opportunity to get involved in the project without dedicating a lot of time.
Bitesize bugs for Pop!_OS (distro).
Bitesize Bug Example
Let's go through how to contribute via a bitesize bug fix. First take a look at what is listed as a bitesize bug via the issue tracker.
For this example I've identified an issue with the terminal colors.
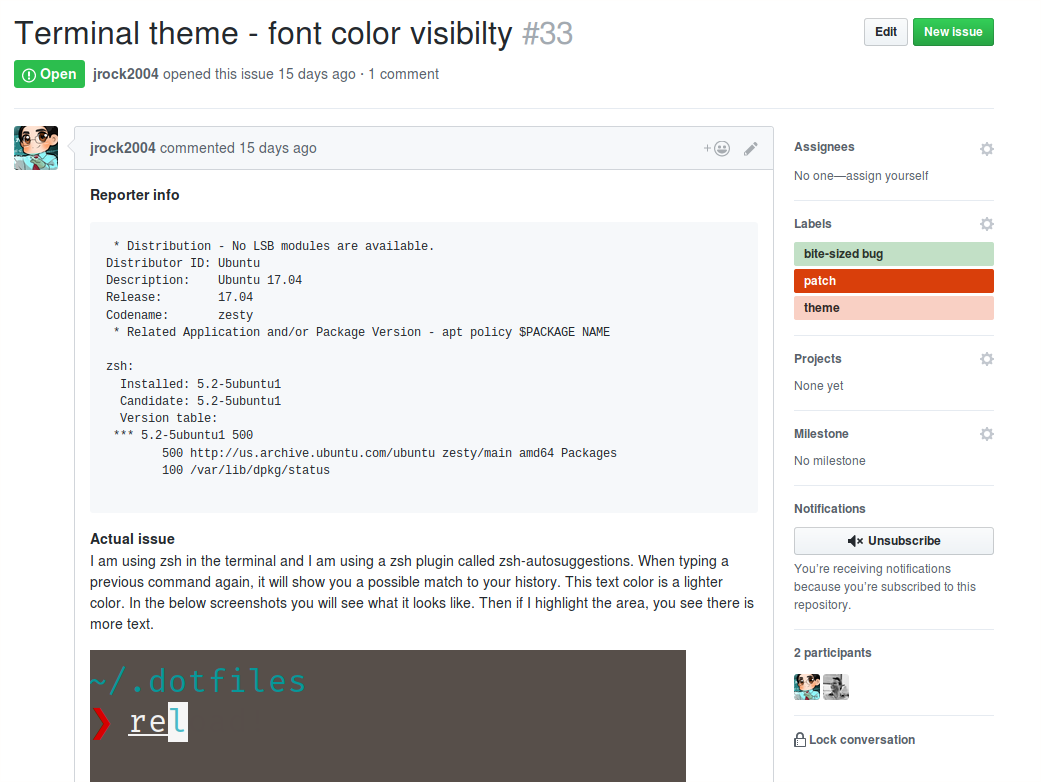
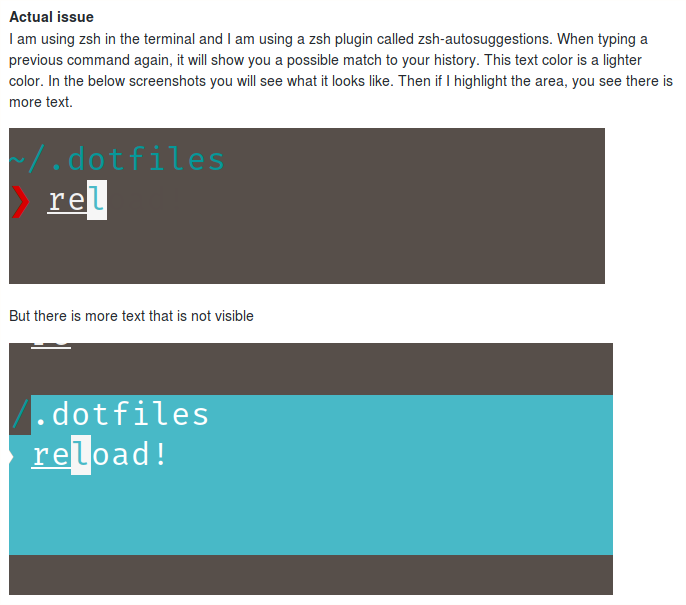
It looks as though one of the colors for text in the palette is the same as the background, so it doesn't show up.
But our hero jrock2004 has identified a potential solution:
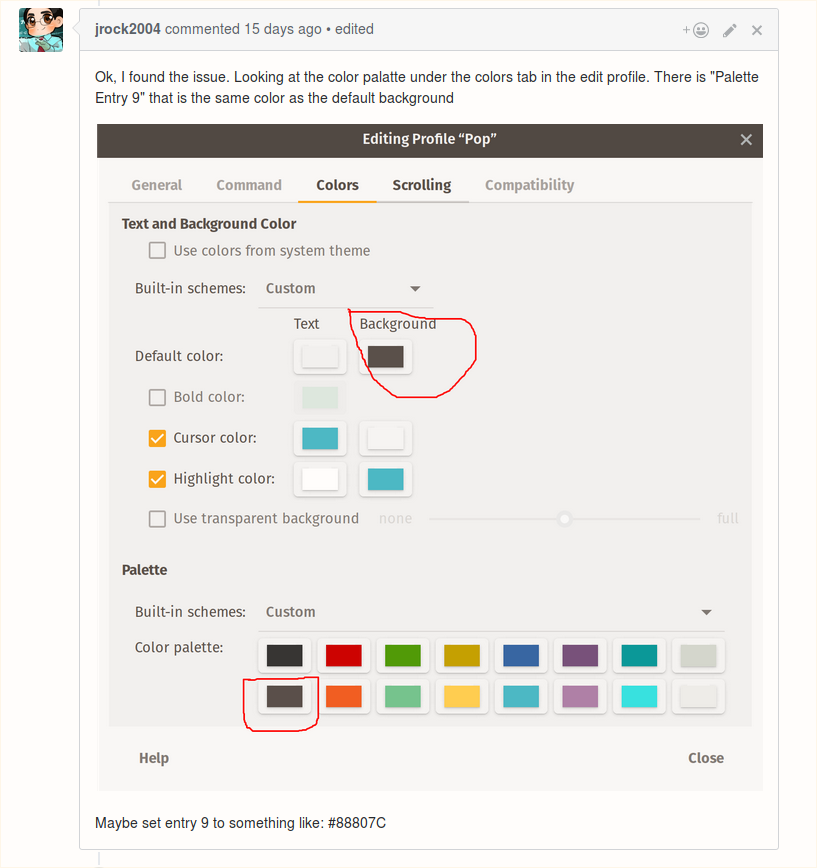
That makes this a great bite-sized bug! So the first thing we have to do is sort through where this bug is. jrock2004 identifies that this is a default setting, and looks in the pop-default-settings repo, it's there that he finds the problem in this file, where it lists out the org.gnome.Terminal.Legacy.Profile.
If we are going to fix this problem, we have to pull down the source code. So let's do that. This can be done by clicking the "Fork" button in the top-right corner of the project page on GitHub (pictured below).

Once you have forked the project, you should have a copy in your own GitHub account (if you don't already have an account, you'll have to create one).

See the name there? Since this is my account (Ryan), you see the repo is beside my name, and under it says "forked from system76/pop-default-settings". Now we can clone the repository down to our own computer and make the necessary changes. First, you should install git.
sudo apt install git
Once you've done that take a look at the "Clone or Download" button, give it a click and copy the link it displays. If you don't have an SSH key associated with your GitHub account here's how. If you don't want to do that right now, you can pull down the code with HTTPS, you'll have to enter your username and password - to do that click the "Use HTTPS in the corner of the Clone box" (pictured below).
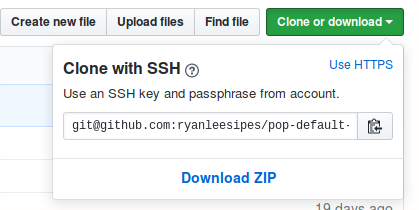
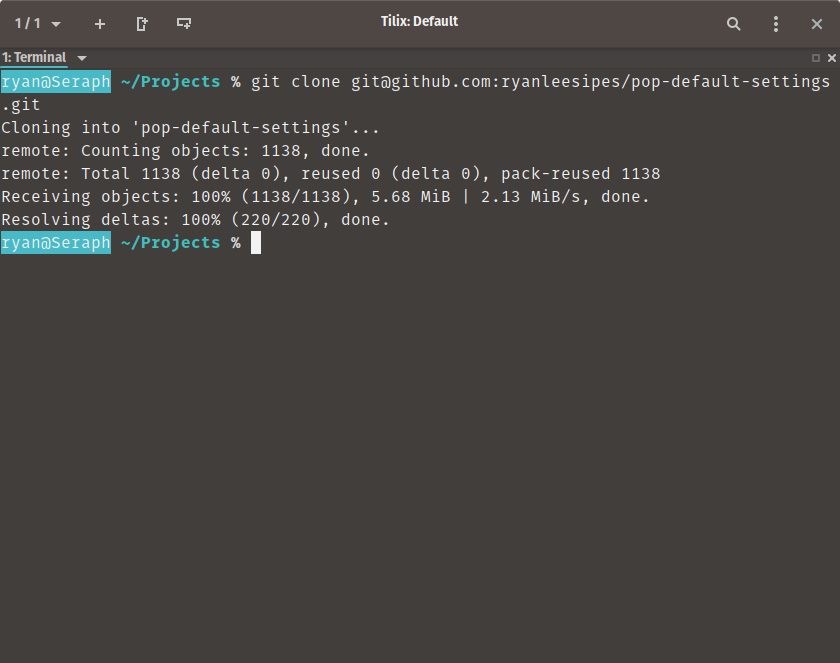
Once you have copied the link in the clone box, run the following command(shown with https).
git clone https://github.com/ryanleesipes/pop-default-settings.git
Enter any information requested (with HTTPS it should just be your GitHub username and password). Following that it should download the files for the project and put them in a folder in the directory you are currently sitting in within your terminal.
Next I open the file we identified above in my text editor of choice, Atom. You can use the text editor you prefer. I find the line with the palette settings.
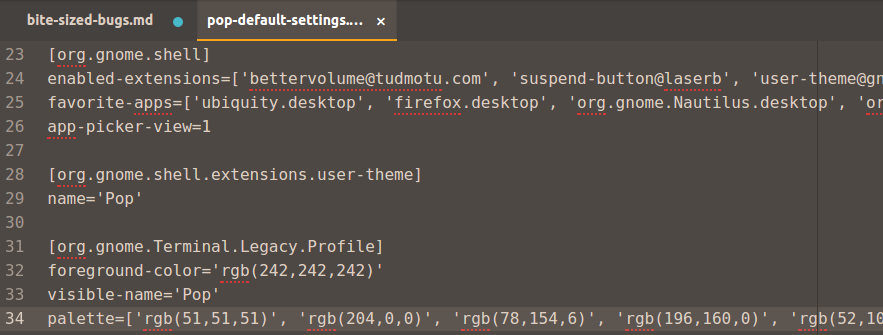
I'll change the proper setting in here (took some RGB brushing up to figure out which one was the right one).
Before:

After:

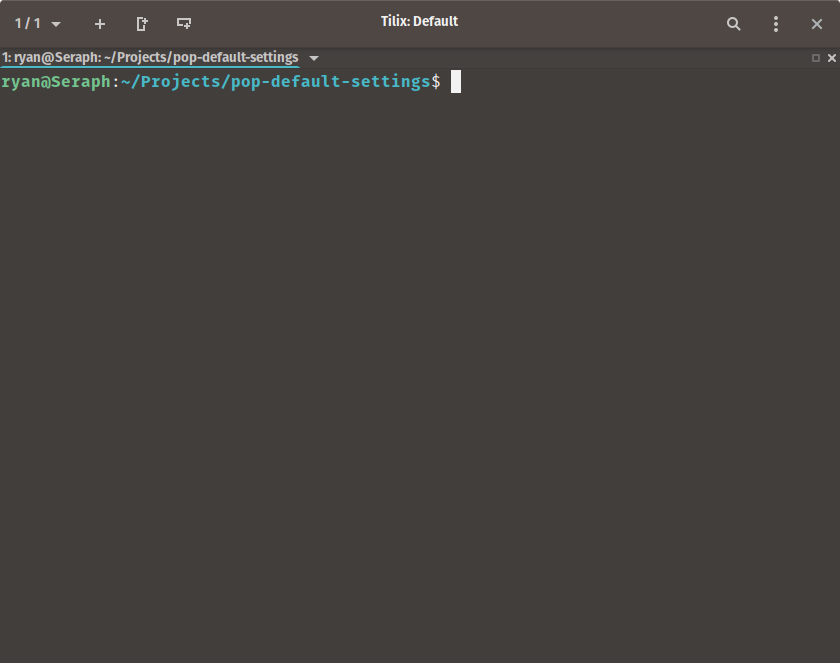
Now that the change is made, the file needs to be saved. Once it is saved we can make a commit, commits store that change in Git allowing us to share that change with the world. Make sure you are in the project directory (in this example that would be pop-default-settings).
I'll run the following command:
git commit -am "Updated the default palette settings in terminal, changed a color for better visibility."
If you'd like to know why the commit command has the arguments, the Git/GitHub documentation can explain that better than most. You can go through a Git tutorial here.
The output should look like this:

Now you can run the following command to push your changes from your local machine to your forked repository on GitHub:
git push
If it's your first time pushing to a remote repository, you might be asked to setup who you are. That's fine, follow the instructions in your terminal.
Once it has completed the push, you'll see something resembling the following:
Going to your repo, above the code, you should see something along the lines of "This branch is 1 commit ahead of system76:master":

Click on "Pull Request" when you are ready to submit your code for review by the Pop!_OS maintainers. You'll see a webpage detailing the work that you've done. Review it and if everything looks good click on the "Create Pull Request" button, and you've successfully contributed!
Maintainers sometimes provide feedback, upon which you will receive a notification in your GitHub account. If you incorporate their changes and push again that should be reflected in your pull request. If you have any trouble, ask the maintainer reviewing your pull request for help!