Support Articles
Auto-Mount Second Hard Drive(s)
If you've added a second drive to your computer when you originally ordered it, then it came pre-formatted and ready for use; no additional setup is required. The drive will be made available when you first open it up after each time you start your computer, and will remain mounted until the next start/boot or until you click the eject (⏏) icon. If you prefer to have the drive made available (mounted) automatically every time you start your computer, this is possible with some configuration changes.
Auto-mounting is a per user configuration, and is optional. Extra drives can always be accessed by clicking on them in the file explorer, which will mount the drive if not currently mounted.
Create Mount Point
Extra drives require a folder on your primary drive where the drive's contents will be made available. This folder is called a mount point. You'll need to create an empty folder in your home folder to serve as this mount point. Navigate to a location for the mount point (e.g. your Documents folder), then right click and choose New Folder, then name the folder appropriately; something like ExtraDrive would work. It's recommended not to include any spaces in your mount point name.
Copy Mount Point Location
Once you've made a mount point, double click it to open it and ensure that it is empty. Any contents within the mount point will be inaccessible while the drive is mounted. Press Ctrl + L on your keyboard, then select all of the text in the location bar that appears and press Ctrl + C to copy it. We'll need it later.
Locate The Drive
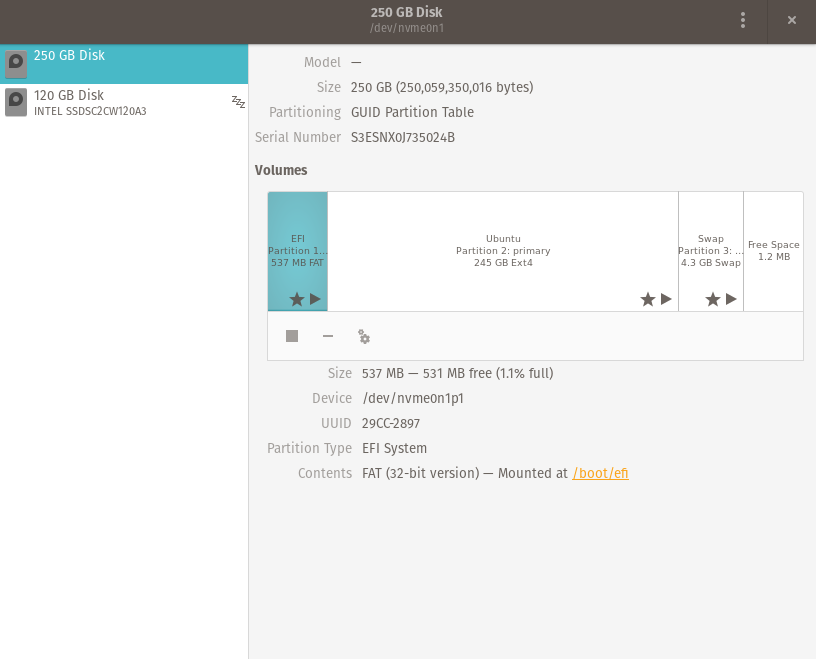
Press the Super Key / and then type in Disks and press Enter. It should open up a window similar to the one below:

Click on your extra drive in the list. You can identify it by size, or by the label; the extra drive is usually /dev/sdb or /dev/sdc.
(Optionally) Format The Drive
If this is a new drive, and it is not formatted, it will need to be formatted before use. If the drive has formatting from the manufacturer, it is usually best to format it to the standard format (Ext4). First, delete the existing partition by clicking the minus button. Then click the plus icon, change the type to (Ext4), give your drive a name, such as Extra Drive, and click Create.
Open Extra Drive Mount Options
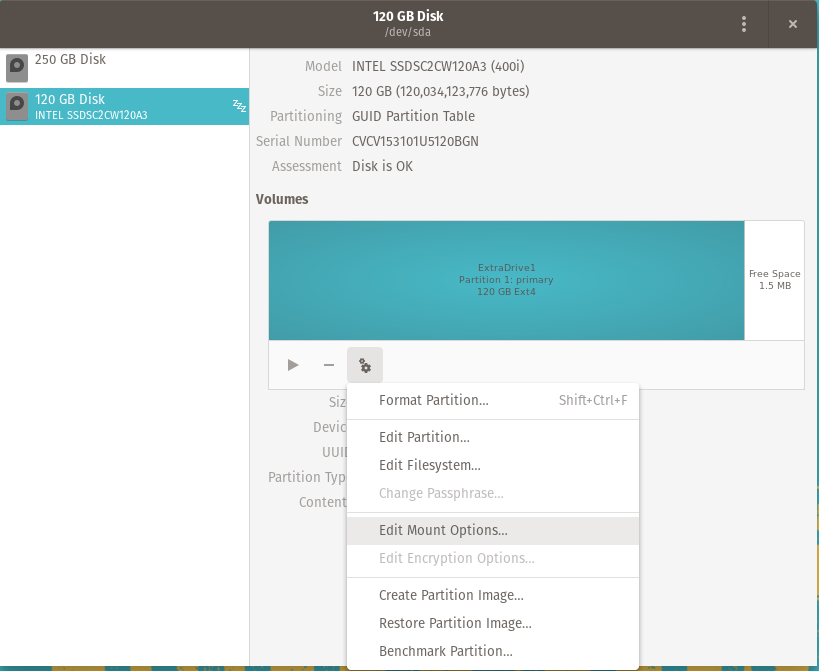
Press the Super key and then type in Disks and press Enter. Click on the Extra Drive Partition under "Volumes", then click on the Gear icon to open the options menu for the Volume. Then click on Edit Mount Options.


Set Mount Options
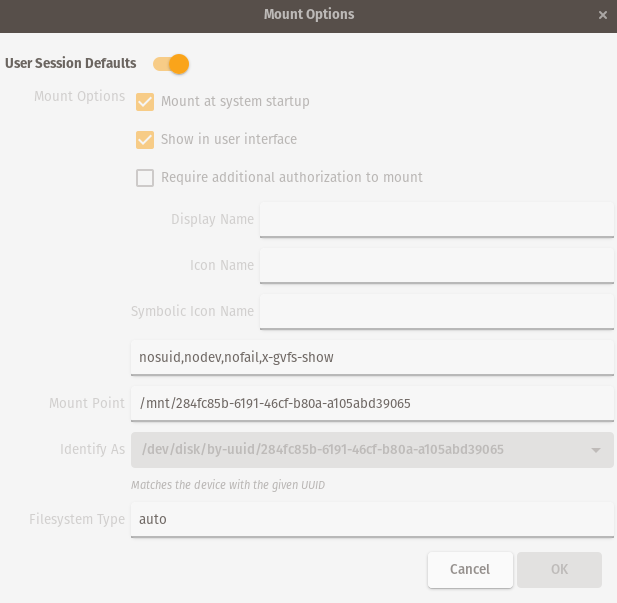
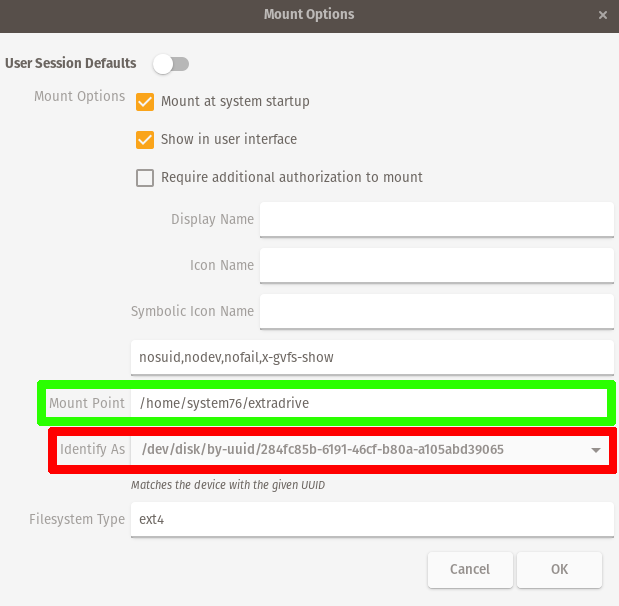
Turn off the User Session Defaults switch, then set the fields as follows:
| Option | Value |
|---|---|
| Mount at startup | Checked ☑ |
| Show in user interface | Checked ☑ |
| Require additional authorization to mount | Unchecked ☐ |
| Display Name | {leave blank} |
| Icon Name | {leave blank} |
| Symbolic Icon Name | {leave blank} |
| {unlabeled field} | nosuid,nodev,nofail,x-gvfs-show* |
| Mount Point | /home/...{from step 2} |
| Identify As | /dev/disk/by-uuid/... |
| Filesystem Type | auto** |
* If you plan on running Windows games via Proton on an NTFS drive, refer to the Proton manual for this field.
** The auto setting is the default. If you're using a non-standard filesystem type, you can enter it here.

The red box shows the item we don't want to change and the green box shows the item we want to change.
Save And Restart
Once the mount options are set up correctly, click OK to save the changes and then restart your computer. After the computer starts back up, ensure that there are no error messages during the boot, and that the drive is mounted when booting. You can check this by opening your home folder and ensure that you see the eject icon (⏏) next to the drive before you click on the drive.