Support Articles
Installing Pop!_OS
The following guide describes how to download the Pop!_OS.iso image, write it to a flash drive, and install it on the hardware of your choice.
Requirements
System Specifications
| Component | Requirement | Recommended |
|---|---|---|
| CPU | 64-bit x86, ARM (RAS PI 4) architectures | |
| RAM | 4 GB | 8 GB |
| Drive Storage | 20 GB |
From https://system76.com/pop/download/, choose DOWNLOAD under the section best matching your computer (generic, NVIDIA, or Raspberry Pi). The download page includes the current Requirements and download Filesize, as well as the image checksums used to verify the file once downloaded.
Installation Media
The Pop!_OS.iso can be easily flashed to a USB drive. See our Live Disk Creation article for instructions to create a bootable USB drive in Windows, macOS, and Linux.
Secure Boot
Secure boot must be disabled before installing Pop!_OS. Secure boot can be disabled in the BIOS of most computers; however, the process to disable secure boot will vary by laptop and motherboard model.
Selecting Your Bootable USB Drive as a Boot Device
Power off the target computer and insert the bootable USB. Power on the computer and enter the boot device menu selection for your BIOS or UEFI system. The table below lists lists several common methods for System76 laptops and desktops. Consult your computer manufacturer's documentation to access this menu on third-party computers.
| Firmware | BIOS key | Boot Menu key |
|---|---|---|
| Laptop - Open Firmware | ESC | ESC (select one time boot option) |
| Laptop - Proprietary | F2 | F7 |
| Older Laptops | Depends on the system | F1 |
| Thelio | Del | F8 or F12 |
| Meerkat | F2 | F10 |
Installing Pop!_OS
Once your bootable USB drive is selected as a boot device, your computer will boot into a live Pop!_OS environment.
-
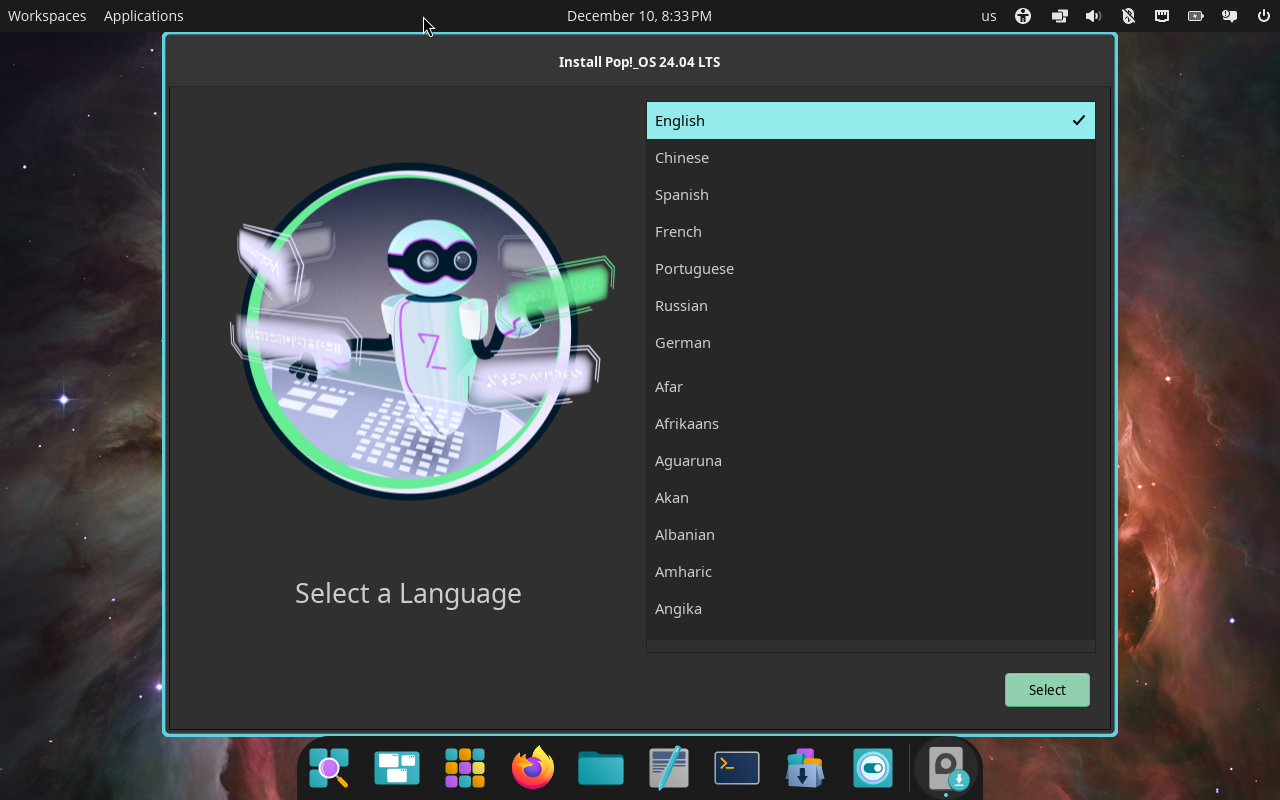
Select your language:
-
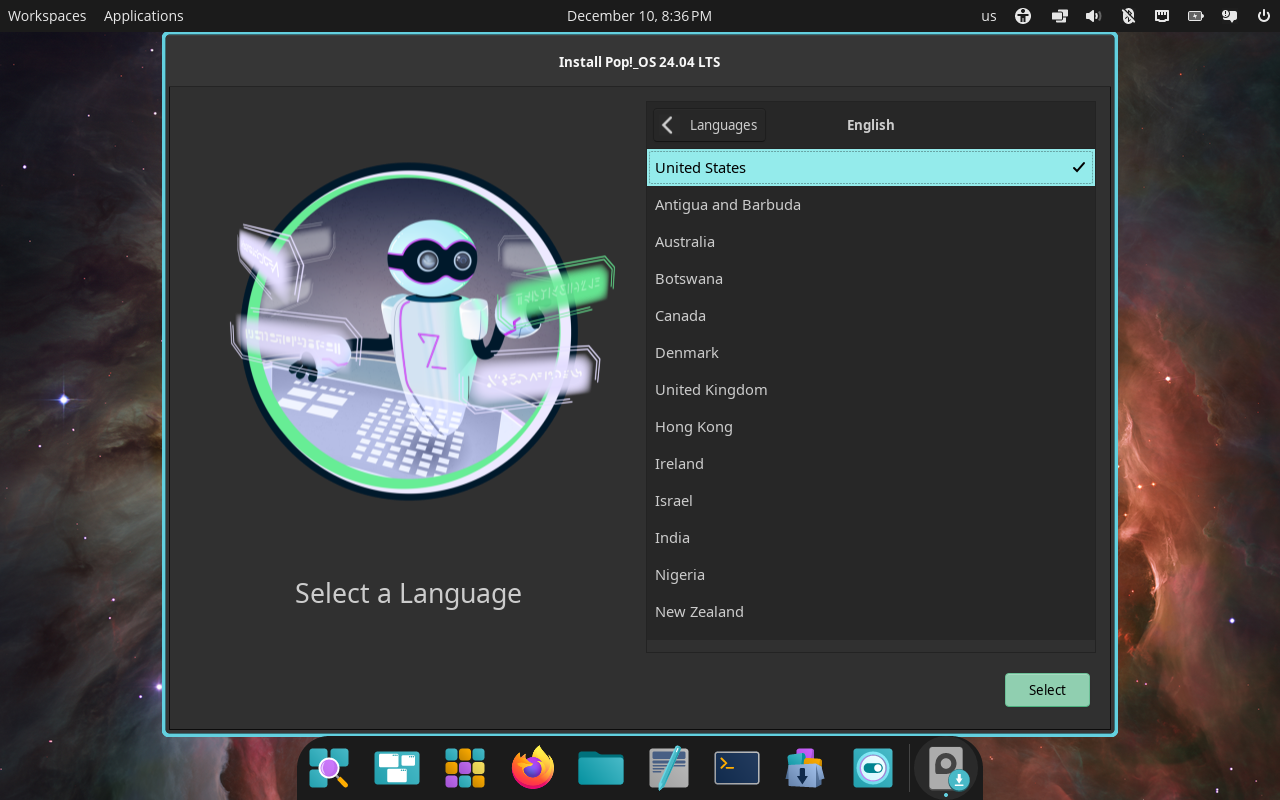
Select a locale.
-
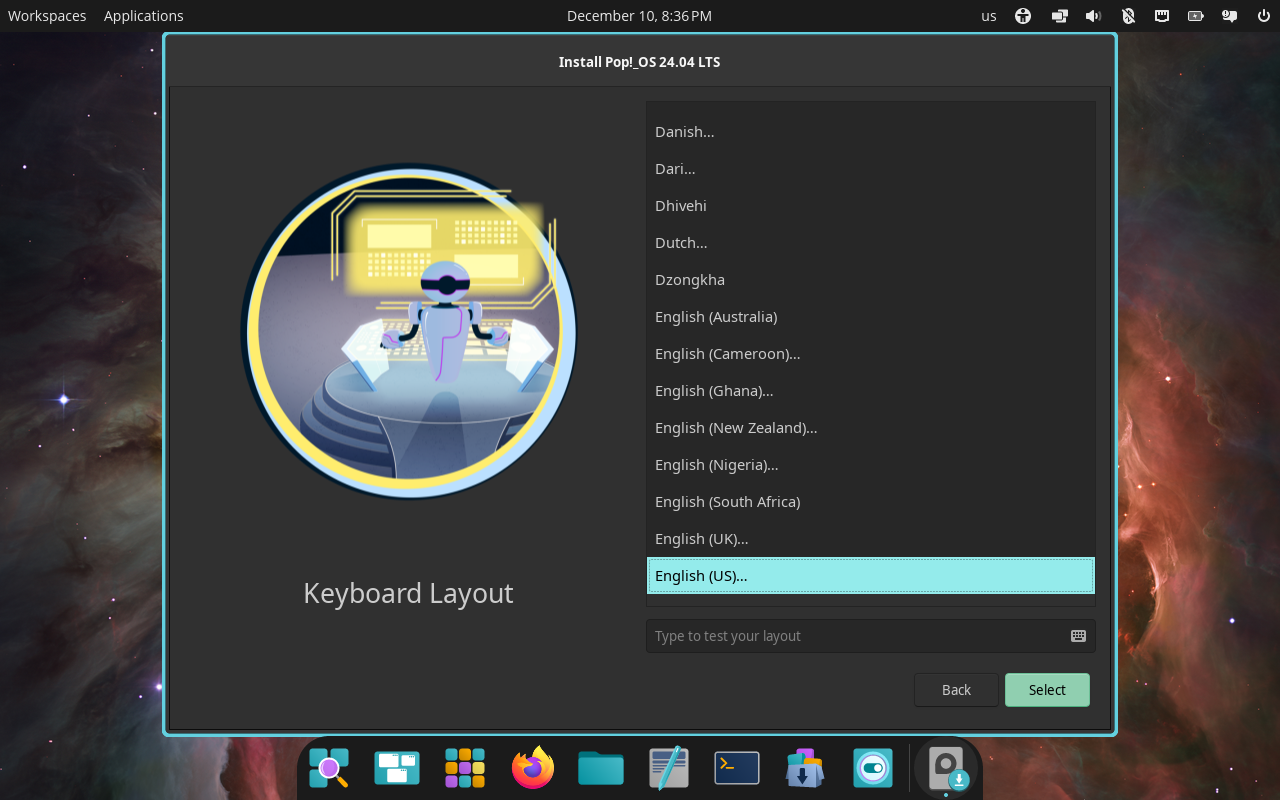
Select a keyboard input language.
-
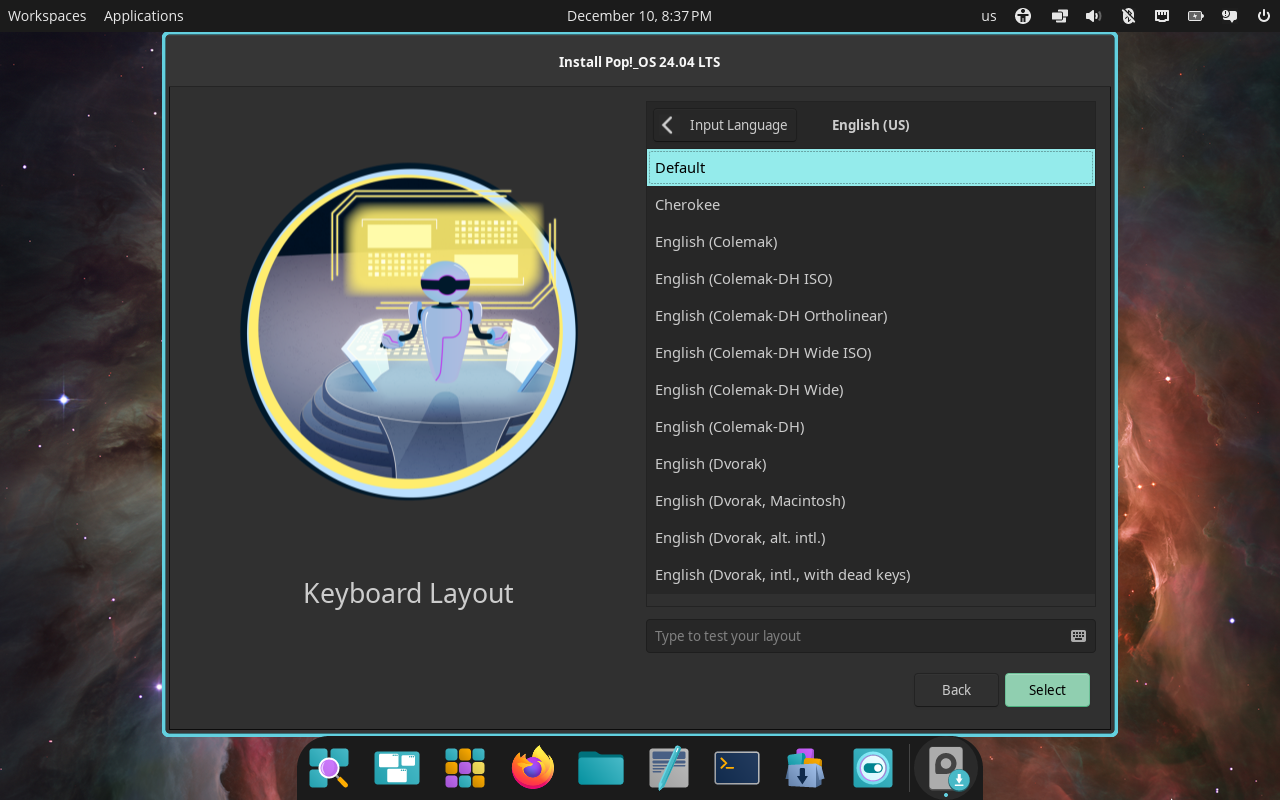
Select a keyboard layout.
-
Choose the
Clean Installoption for a standard installation. This is the best option for new Linux users, but be aware that this will erase all contents of the target drive. Alternatively, you can selectTry Demo Modeto continue testing Pop!_OS in the live environment.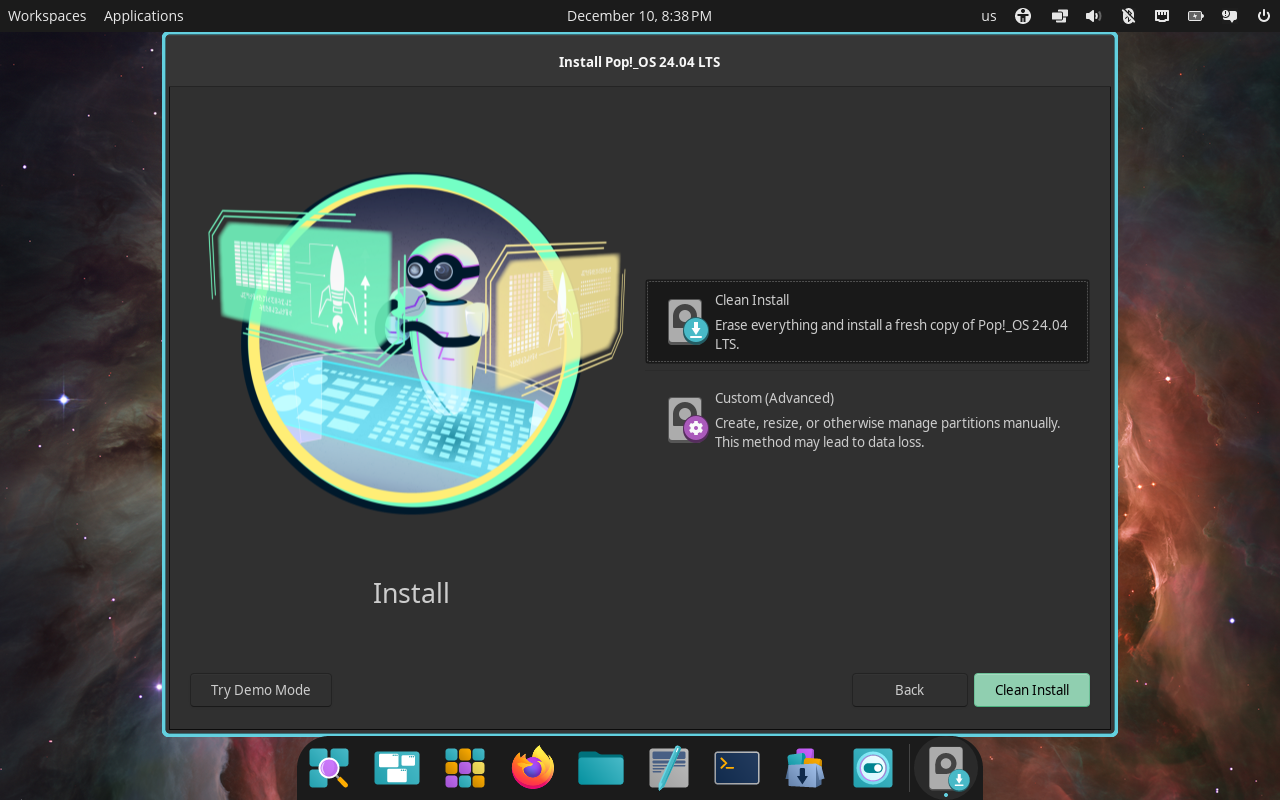
Select
Custom (Advanced)to access GParted. This tool allows configuring advanced features like dual booting, creating a separate/homepartition, or placing the/tmppartition on a different drive. -
Click
Erase and Installto install Pop!_OS to your selected disk.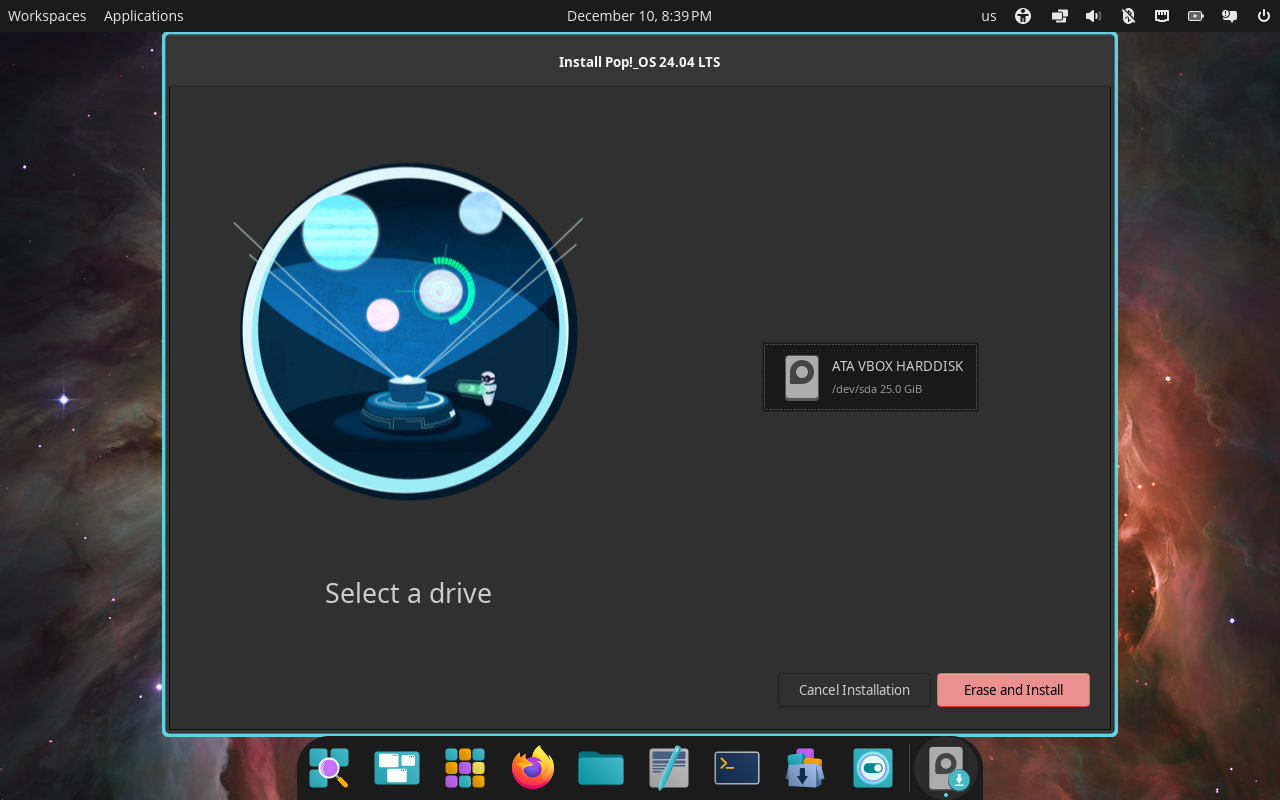


User Account Setup
The next section of the installer will guide you through creating a user account so you can log in to your new Pop!_OS installation.
Provide a full name (this can include any text you want, uppercase or lowercase), as well as a username (which must be lowercase):


Full Disk Encryption
Encrypting the system disk is not necessary, but it ensures user data is secure in the event that someone gains unauthorized physical access to the device.
The drive can be encrypted using your login password by checking Encryption password is the same as user account password, or you can uncheck this box and select Set Password at the bottom. Select Don't Encrypt to skip the disk encryption process.

If you chose the Set Password button, you will see an additional prompt to set your encryption password. This will be requested every time the system boots.
Continue to the next step in the installer. Pop!_OS will now begin installing to disk.

When installation completes, reboot your computer and log in to complete the user account setup process.
ℹ️ If you changed the boot order to prioritize your live USB during startup, shut down the computer completely and remove the installation USB. If you are dual-booting, press the appropriate keys to enter setup and select the drive containing the Pop!_OS installation.

NVIDIA Graphics
If you installed from the Intel/AMD ISO and your system has discrete NVIDIA graphics card or if you added one later on, you will need to manually install the drivers for your card to get the optimum performance. Run the following command in a command terminal to install the driver:
sudo apt install system76-driver-nvidia
Initial Setup
After rebooting, if you chose to encrypt your drive, you'll be prompted to enter the decryption passphrase first. After that, the COSMIC Greeter screen will appear and prompt for your user account password.

At first login, the screen reader will be active. The first page of the initial setup is for accessibility settings and includes the screen reader, magnifier, high contrast, and color invert options. To disable the screen reader during initial setup, turn off the screen reader switch on the right. Click Next to advance to the next setup window.

Personalize the desktop appearance with one of the pre-configured color themes, then click Next. (You can further customize accent colors and the look of your desktop in Appearance Settings after the initial setup is complete.)

Choose the layout configuration for your dock and panel, then click Next. (This screenshot shows the default "Top Panel & Bottom Dock" layout; later screenshots show the "Bottom Panel" layout.)

The following pages during initial setup are for informative purposes. Click Next on each page to advance to the next, or click Skip setup and close at any time to finish the setup.
New System Applications

Workspaces for Your Workflow

New Keyboard Shortcuts

Fast and Efficient

On the last informational page, click Finish to advance to your new Linux desktop installation of Pop!_OS.

To customize Pop!_OS 24.04 further, visit COSMIC Settings by clicking the toggle button icon in the dock.
