Support Articles
Creating Log Files
Log files help our support team learn more about your system, and can be a great benefit during troubleshooting.
The information collected by the log files includes:
- The installed operating system and active kernel version
- A listing of the filesystems connected to your system, and the space used
- Information about your firmware
- A list of disks connected to your system, as well as connected USB devices
- Sensors information showing temperatures and fan speeds
- Comprehensive output from
syslogandjournalctl
The detailed contents of the log file are listed below:
/apt/sources.list.d/*
/apt/history.log
/apt/history-rotated.log
/apt/sources.list
/apt/term.log
/apt/term-rotated.log
df
dmesg
dmidecode
fstab
journalctl
lsblk
lspci
lsusb
sensors
syslog.log
systeminfo.txt
upower
uptime
xorg.0.log
Generating Log Files in Settings (Pop!_OS 21.10+)
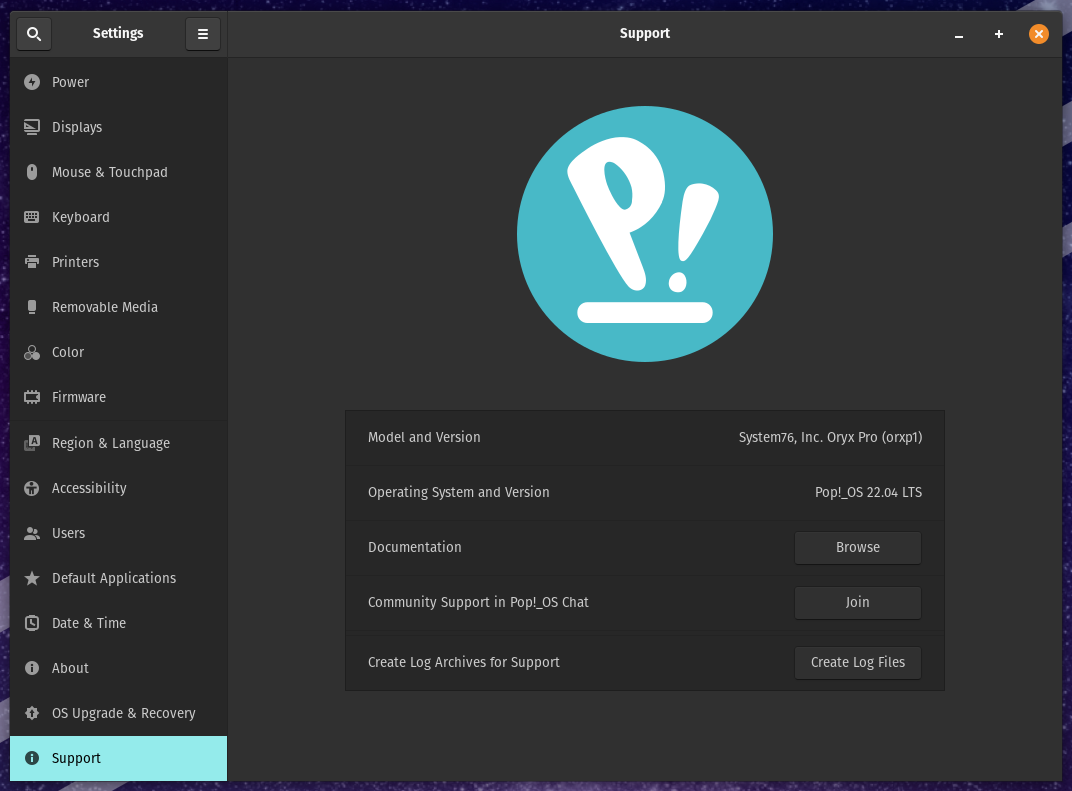
Starting in Pop!_OS 21.10, logs are no longer generated through the System76 Driver application. Instead, a "Support" section has been added to the Settings application. Clicking the Create Log Files button will prompt you for your admin password, and then generate and save a file called pop-support_[timestamp].tar.xz. This file is saved in your Home directory (/home/username).

Generating Log Files Using the System76 Driver Application
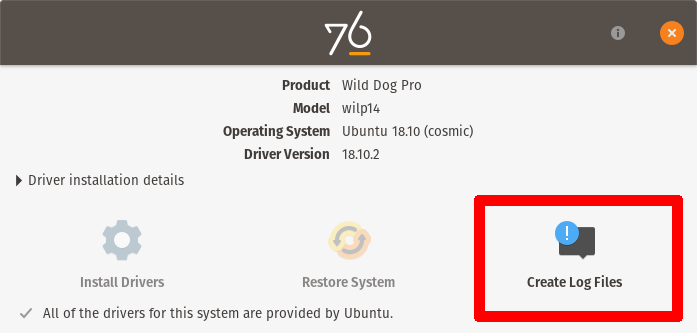
The System76 Driver can be opened by clicking the Activities or Applications button in the top left (or pressing the SUPER key), then searching for "System76." Among the applications listed should be the System76 Driver application. Click the icon to launch the application, and enter your password when prompted to do so.
Next click on the button outlined in red in the System76 Driver application and a file called system76-logs.tgz will be created and placed in your Home directory (/home/username).

Manually Generating Log Files
If for some reason you are unable to access the System76 Driver application, you can manually create a set of log files by running a series of commands via the Terminal application. To do this, click Activities/Applications in the top left of your system, search for "Terminal", then open the application that appears.
You can also launch Terminal with keyboard shortcuts:
Pop - SUPER+T
Ubuntu - CTRL+ALT+T
From there, you can enter the following commands:
cat << "EOF" > make-logs.sh
#!/bin/bash
echo "Creating Logs"
mkdir -p ~/system76/apt
cp -r /etc/apt ~/system76/apt
mkdir -p ~/system76/apt/logs
cp -r /var/log/apt ~/system76/apt/logs
journalctl --since="4 days ago" > ~/system76/journal.log
sudo dmesg > ~/system76/dmesg.log
cp ~/.local/share/xorg/Xorg.0.log ~/system76/Xorg.0.log 2>/dev/null
sudo dmidecode > ~/system76/dmidecode 2>/dev/null
sudo lspci -vv > ~/system76/lspci.log 2>/dev/null
sudo lsusb -vv > ~/system76/lsusb.log 2>/dev/null
uname -a > ~/system76/uname.log
df -h / > ~/system76/df
lsblk -f > ~/system76/lsblk
cp /etc/fstab ~/system76/fstab 2>/dev/null
cp /etc/os-release ~/system76/os-release 2>/dev/null
upower -d > ~/system76/upower
[ -f /usr/bin/sensors ] && sensors > ~/system76/sensors.log
tar cvzf ~/system76-log.tgz ~/system76/
rm -rf ~/system76/
rm make-logs.sh
EOF
bash make-logs.sh
As with the System76 Driver application, the log files will be stored within your home directory.
Sending the Logs to the Support Team
Once the logs are created, you can attach them directly to the support case.
NOTE: In some cases, error messages can grow log files to a size too large for an email attachment. If that's the case, use a file sharing service like Google Drive or Wormhole, and then include the share link in an email response to the support ticket.