Support Articles
Login with Yubikey
If you have a Yubikey, you can use it to login or unlock your system.
To do this you must install the yubikey packages, configure a challenge-response slot on the Yubikey, and then configure the necessary PAM modules.
NOTE: Open an additional root terminal: sudo su
Install Packages
To install the necessary packages, run:
sudo apt install -y libpam-yubico yubikey-personalization yubikey-manager
Configure Challenge-Response for your Yubikey
To enable challenge-response on your Yubikey in slot 2, type the following command:
ykman otp chalresp -g 2
This configures slot 2 for challenge-response, and leaves slot 1 alone.
Next we need to create a place to store your challenge response files, secure those files, and finally create the stored challenge files:
sudo mkdir /var/yubico
sudo chown root /var/yubico
sudo chmod 700 /var/yubico
ykpamcfg -2 -v
You should receive a message similar to:
Stored initial challenge and expected response in '$HOME/.yubico/challenge-123456'.
You should receive a unique challenge-serial in your output.
Now, to finish up:
sudo mv ~/.yubico/challenge-123456 /var/yubico/aaronh-serial
sudo chown root.root /var/yubico/aaronh-serial
sudo chmod 600 /var/yubico/aaronh-serial
Pay close attention when copying/pasting the commands above. The challenge-123456 and aaronh-serial needs to match the both the output from the ykpamcfg command and the final file needs to match the name of your user name and serial.**
Configure Plugable Authentication Modules
Before making any changes to the files listed below, I highly recommend backing up each file, and having a sudo/root session open in case you need to roll-back.
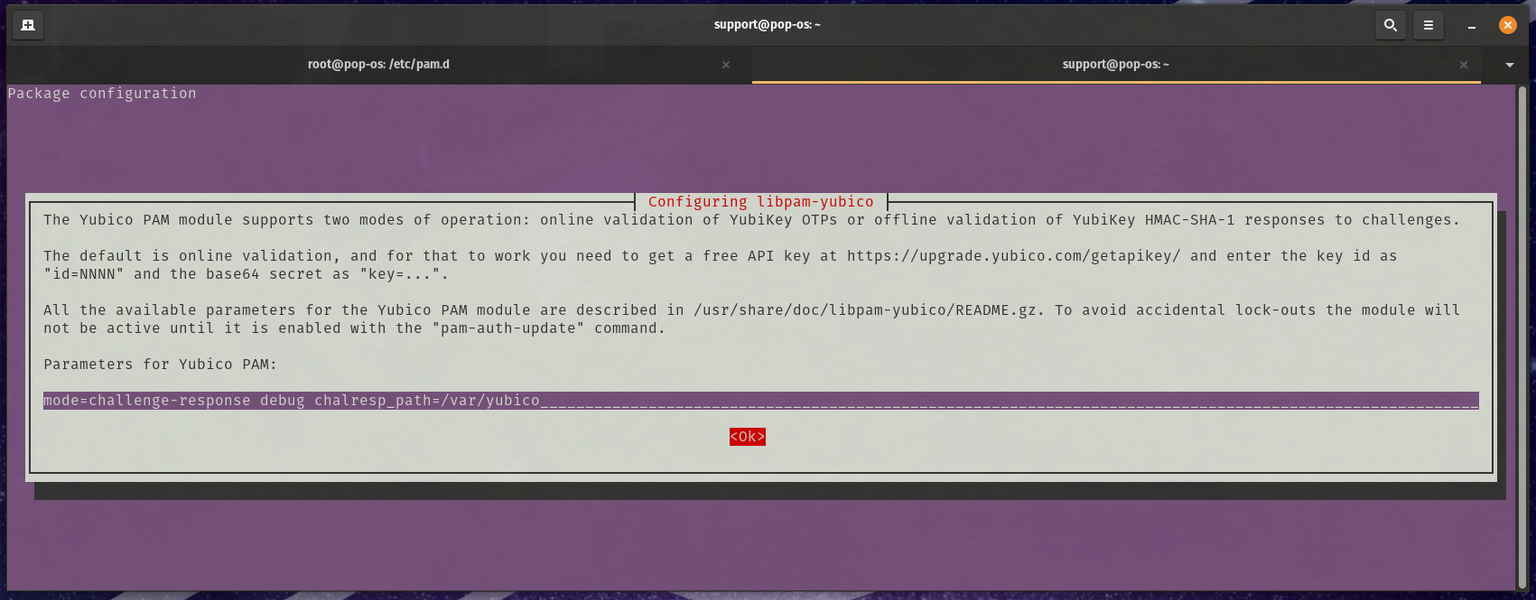
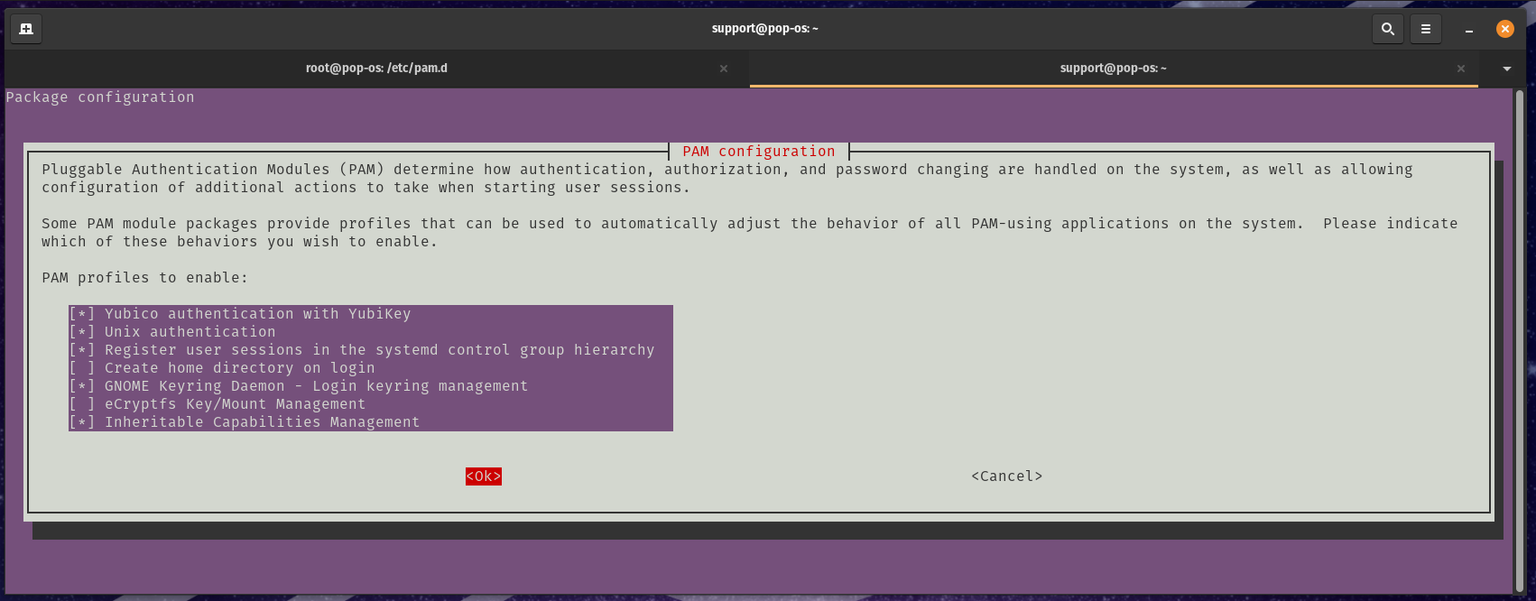
sudo dpkg-reconfigure libpam-yubico
You will want to change the "Parameters for Yubico PAM:" to be:
mode=challenge-response debug chalresp_path=/var/yubico
Note: The debug option is used for testing the change, review the Debugging and Testing section of this article for more information.


Setting this to sufficient is the recommended method as the login manager will take your password or the Yubikey to login. To do this you will need to change the second setting in the following line in /etc/pam.d/common-auth:
auth sufficient pam_yubico.so mode=challenge-response chalresp_path=/var/yubico
This configures your system to accept your Yubikey as an acceptable login alternative.
If you want your Yubiky to be required to login, then you need to change sufficient to required (which is the default). For example:
auth required pam_yubico.so mode=challenge-response chalresp_path=/var/yubico
There a a number of other options for PAM and ways to configure that to your liking. Check the man pages for more information. Also, the Yubico PAM module page has a pretty good breakdown.
- /etc/pam.d/common-auth
- /etc/pam.d/login
- /etc/pam.d/gdm-password
Debugging and Testing your PAM configuration
You will want to keep a root terminal logged in while setting this up to make sure you can reverse any changes that do not allow you to login. In the initial setup, the parameters to setup libpam-yubico included debug message. "Sudo" on the command line will now show debug output when run.
With the Yubikey plugged into the system simulate a login with the following commands:
support@pop-os:~$ sudo -s
[snip lots of logging]
[sudo] password for support:
root@pop-os:/home/support#
Test you setup if you are changing the "sufficient" setting to "required" before removing the "debug" setting. Use new terminal windows to simulate a login both with your Yubikey attached and out of the system. In "required" mode, you should not be able to finish a login with the Yubikey not plugged into your system.
Once you are sure that this works with your testing, remove the debug option:
auth required pam_yubico.so mode=challenge-response chalresp_path=/var/yubico
from "/etc/pam.d/common-auth".
References
The following sites were used to build this guide:
- Authentication Using Challenge Response (From Yubikey).
- Yubico PAM Module (From Yubikey).
This article was contributed by 71nuxadd1ct.