Support Articles
Back Up Files
There are many ways to back up important files on your computer. It's a personal choice which one to use based on habits, preferences, and what is being backed up. We will outline a few options here, but the final solution may be a mix of several of these options.
Data Policy
The key to good backups is having the data automatically backed up, accessible, secure, and distributed. All backup solutions should be evaluated against these 4 criteria:
- Automatic: Data is automatically backed up. Manual copies work well in some cases, but automatic backups makes sure it's always fresh, and that nothing is lost if a manual backup isn't performed.
- Accessible: Data needs to be retrievable and easily restorable if the original is lost.
- Secure: Data needs to be accessible only by the owner. Cloud solutions are convenient, but additional steps may be required to make sure the data is private.
- Distributed: Data needs to be in multiple places. If all the copies are in one location, the risk for data loss increases (for example, if your data is saved to a USB disk in your house, but there is a fire, both the computer and the backup disk could potentially be lost at the same time.)
NOTE Good practice to prevent data loss is to ensure that any important files are backed up in at least three (3) places. Two (2) copies on-site, and one (1) copy off-site. This off-site backup could be through a cloud storage solution, a drive that's kept at a relative's house, or in a safety deposit box.
User Files
User files are the most common data to back up. This includes documents, pictures, and other personal files. Typically, these documents are all saved in your home directory (/home/username).
Deja Dup
Déjà Dup is a popular, straightforward backup option. It can be used to back up user data locally, remotely, or to a cloud server. It can also be set up to run automatically on a regular basis.
Installation
To install Deja Dup, search for it in the Pop!_Shop, Ubuntu Software or run this command:
sudo apt install deja-dup
If Deja Dup can't be installed using the apt command, you can install it using the flatpak program by running the following command:
flatpak install flathub org.gnome.DejaDup
Once Deja Dup is installed, it will be labeled as "Backups" in the Activities overview.
Selecting Data to Backup
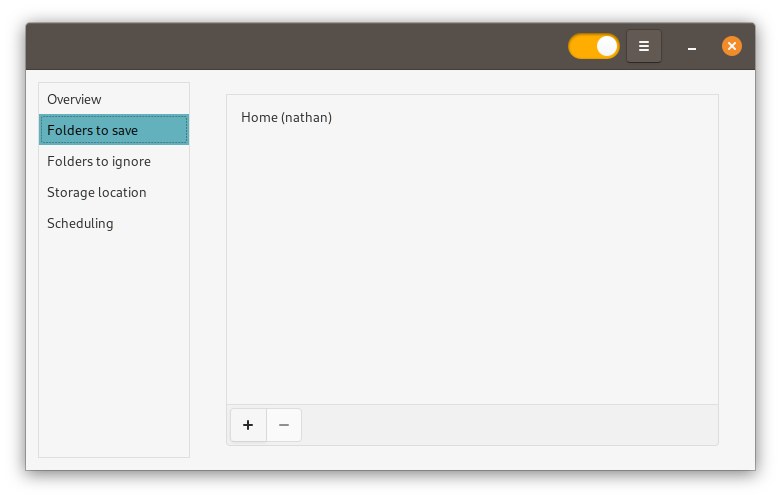
With Deja Dup (Backups) open, you can select the folders you wish to save or ignore using the pages listed on the left. By default, Deja Dup will backup your entire home directory, which includes your Documents, Pictures, Music, and Videos folders. It ignores your Downloads folder and any items in the Trash. Use the plus and minus buttons as needed to modify both categories.
Choosing a Backup Location
On the Storage location page, you can configure the location where your backup will be stored.
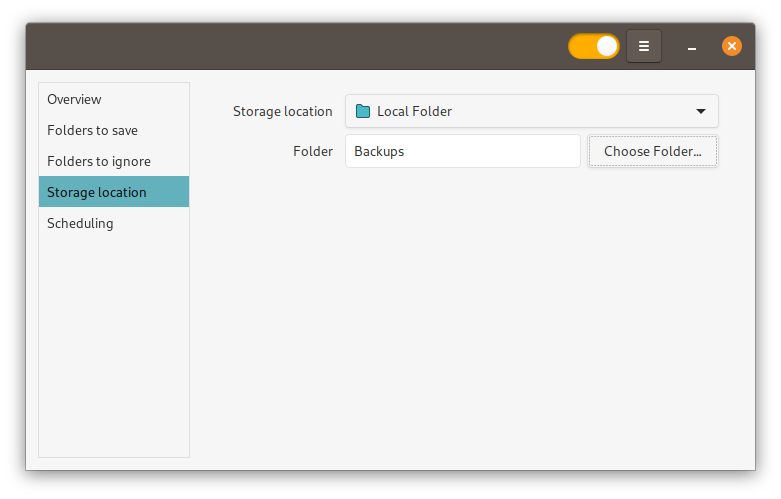
The available options are:
Local Folder - Back up data to an internal or external hard drive, SSD, or USB flash drive.
Pros: Easy to set up, automatic, accessible, and secure. Backups typically happen quickly because they're using a high-speed direct connection.
Cons: Single point of failure. If the computer is lost or if both drives fail, the data is lost.
Network Server - Back up data to another computer or storage device (NAS) on your network.
Pros: Same advantages as the local backup, but with less of a single point of failure.
Cons: Requires some networking knowledge and the ability to set up another computer or storage device to hold the data. Backups typically take longer because of slower transfer speeds over the network (but still faster than internet storage.)
Google Drive - Back up to Google's cloud service.
Pros: Remote (off-site) location provides geographical redundancy, and is accessible anywhere there is an internet connection.
Cons: Requires a Google account. Your data could be accessible by Google or third parties (including law enforcement). Will be slower to back up (depending on your internet speed), and uses your data transfer/bandwidth.
Scheduling Regular Backups
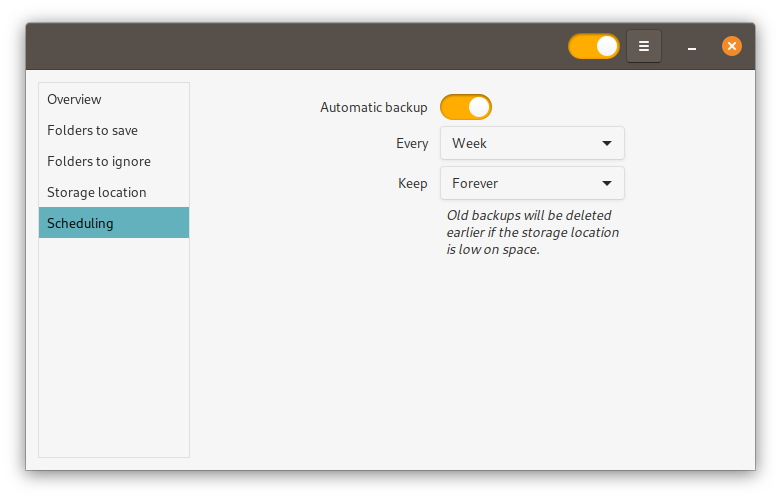
To schedule backups to run automatically, select Scheduling from the list on the left, then flip the switch to enable automatic backups. Schedule the backup for a time when you know the location will be available (for example, when you know you'll have the USB drive plugged in). Many people choose to let their backups run overnight or on weekends.
Restoring Your Data
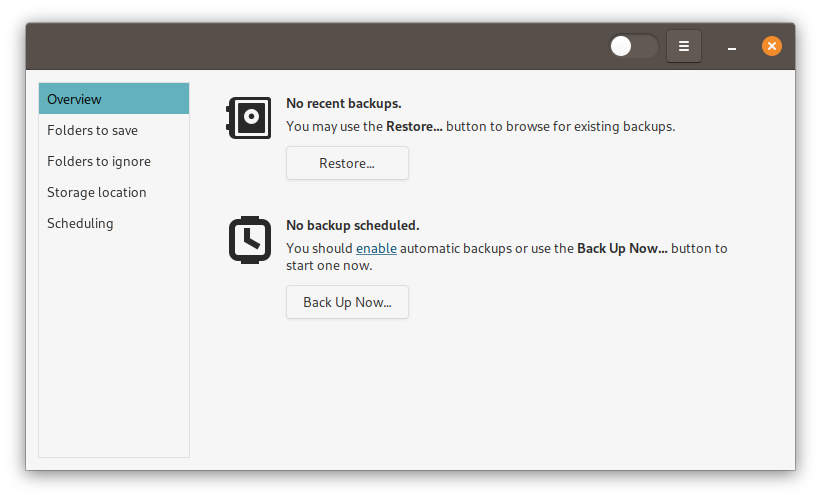
To restore your data with Deja Dup, select the Overview page, then click the Restore... button. This will allow you to select the location containing the Deja Dup backup folder, and will copy the data from the most recent backup to its original location.
Cloud Desktop Clients
Many online services offer small amounts of free storage and desktop clients with automatic synchronization. A few examples of companies that offer cross-platform cloud storage are:
Google Drive does not have a native Linux client, but there is built-in support within Pop!_OS and Ubuntu. However, the built-in support does not automatically copy and keep files locally as the above desktop clients do.
One solution to keep the data from being read by cloud storage providers is to keep all of the files in password-protected archives. A .zip or .7z file with a password is encrypted, and can't be easily accessed by anyone without the password.
Another option is Nextcloud. Nextcloud is an open-source cloud solution that is completely controlled by the user. The remote server needs to be set up manually (or a trusted third party could be paid to set up and maintain the server.)
Copy Data Manually Using the Files App
With an external drive attached, data can be manually copied to an external drive. Use the file browser to copy data from the internal drive to the external drive.
Pros: Easy and straightforward to copy data from one place to another.
Cons: Because the process is manual, updates and changes to the data may be missed over time. No geographic redundancy.
Terminal Only (Advanced)
In certain situations, you may only have access to a command-line interface. The command-line rsync program verifies data integrity and avoids re-copying files that are already backed up.
An example of the rsync command would be:
rsync -a ~/ OUTPUT_DIRECTORY
...where -a tells rsync to output as an archive, ~/ refers to your home directory as the source location, and OUTPUT_DIRECTORY should be replaced with the location of your external disk or your remotely mounted server.
If you access your email through a web browser, manual backup is likely unnecessary, as the data is always being held on a remote computer. If you use a local client such as Thunderbird or Evolution, then the data may be stored in multiple locations (such the email server and other client devices), or only in one. If the IMAP protocol is used, the data is synchronized between all clients; if the POP protocol is used, then the data is only stored on the client where the email was viewed.
Web Browser
Pros: All data is always on a remote server.
Cons: Requires internet access. Email providers may have access to data.
IMAP
Pros: Data is synchronized between the remote server and local devices. No single point of failure.
Cons: Requires internet access. Email providers may have access to data.
POP/POP3
Pros: Data is more secure, as it's only in one location at any time.
Cons: The client storing data is a single point of failure.
User Configuration Files
Most user configuration files are stored in the home folder. These can generally be copied and saved just like any other file, but restoring these files may not always work. Occasionally, programs change how, where, or in what format their configuration files are stored. This means they won't always be restorable, or may not function as intended. It's recommended to back these up as needed, but remember that they may not restore correctly.
Most user configuration files can be found in the home directory, and begin with a period (for example, the .config directory.)
Programs
Because programs are readily available online (usually through software repositories), we don't recommend backing them up. They are spread throughout the file system and are difficult to restore properly. To back up programs, we recommend keeping a list of package names for the programs that you use so they can be reinstalled with a single package manager command, like so:
sudo apt install gnome-tweak-tool mousepad aptitude thunar
Program Configuration Files
System-wide program configuration files can be found in many locations of the OS. The most common location is the /etc folder. Most of these can be backed up in the same ways that user configuration files can, with the same caveat about changes in configuration format when restoring these files. (Unless you have modified system-wide configuration files manually, most configuration is usually stored per-user in the home directory.)
Create and Restore Disk images using Disks app
Pop!_OS comes with a disk management utility called GNOME Disks. You can find it in your apps list.
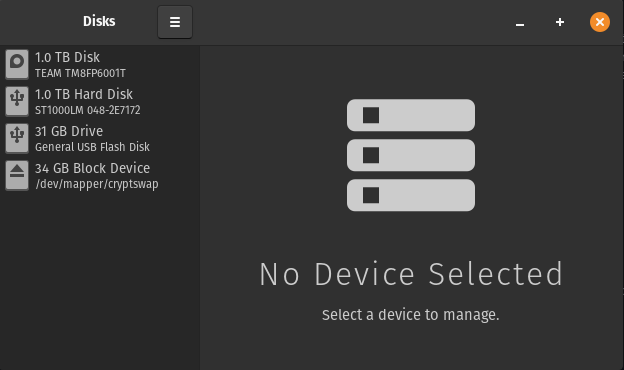
Upon opening, on the left, you will see a list of all disks connected to your computer. Choose which disk you want to back up or restore and click on it.
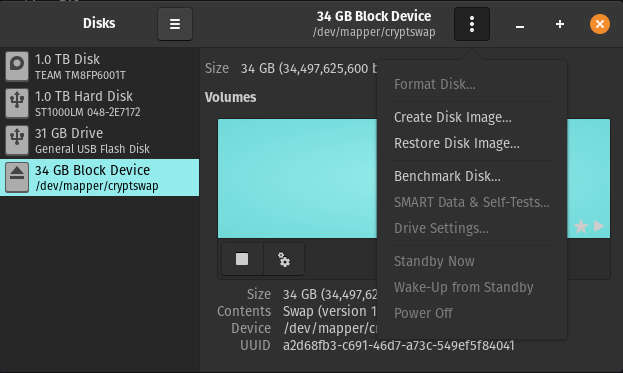
Once you select a disk, a "Disk options" button will appear near the top right corner of the app window. When you press it, a drop down menu will appear, allowing you to select the option you want - to create or restore a disk image.
Creating a disk image
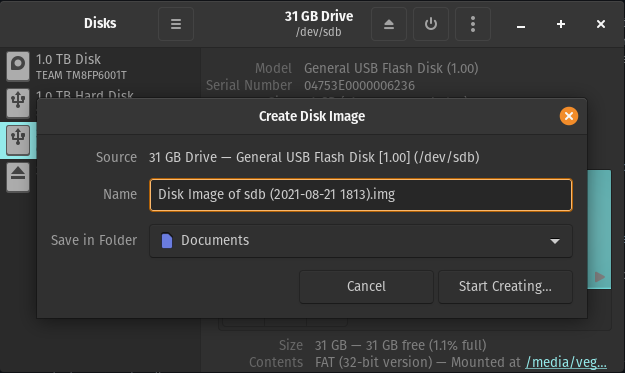
When you press a "Create disk image" in the drop-down menu mentioned before, you will have a pop-up appear, presenting you with choice to name the disk image you're creating and select where to put it.
NOTE that creating a full disk-image is only available when booting from a live disk. You can't make changes to an internal disk or partition from which you're booting.
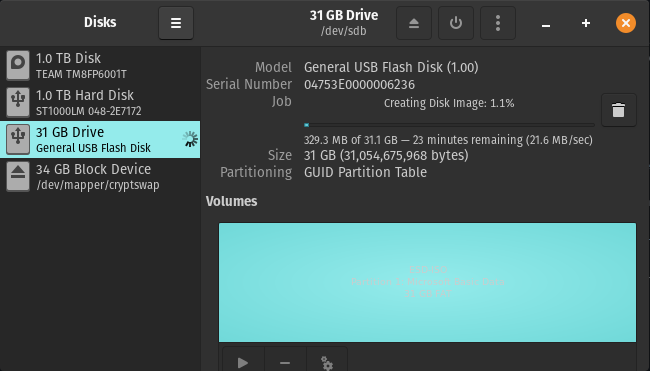
After clicking "Start creating," it may ask for your password. Next Disks will start creating your disk image. A progress bar will be shown. You can cancel creating the image at any time by pressing the trash can icon on the right, next to the progress bar.
NOTE the location that you save the image file to will need to be either the same size or larger (i.e. 1TB will need 1TB or above).
Upon finishing, you will have a disk image file in .img format. The file will have the name you chose and will be saved in the folder you selected.
Restoring a disk image
IMPORTANT NOTE: Restoring a disk image to a drive erases the current contents of the selected drive or partition. Again, this will result in a complete loss of data. Only restore disk images to drives that are already backed up, or on which you don't wish to preserve the data.
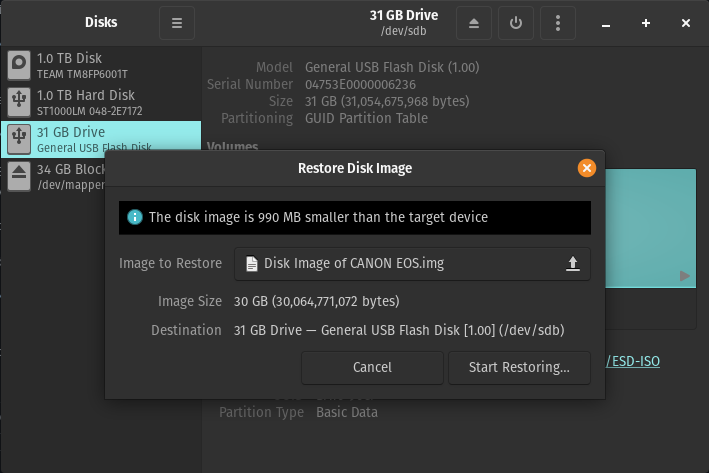
When you press "Restore disk image" in the drop-down menu mentioned before, a pop-up will appear, presenting a button to select which disk image you want to restore The "Destination" will be whichever disk you selected previously (on the left).
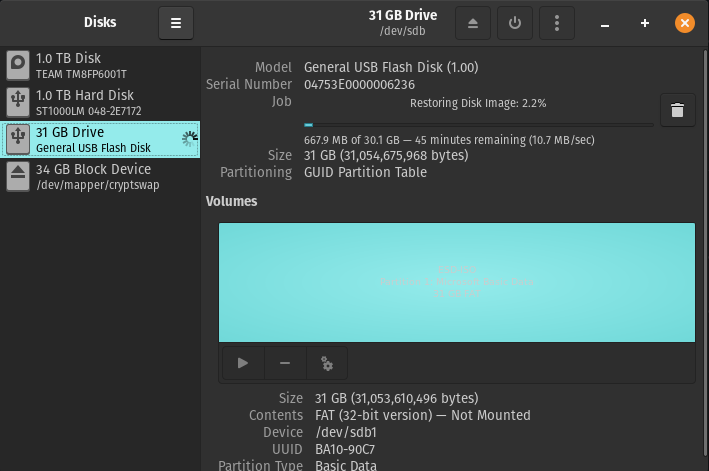
After you press "Start restoring," it will ask for a confirmation and may ask for a user password. After that, process of restoring a disk image onto your disk will start, showing you restoring progress. You can cancel at any time by pressing the trash can icon on the right from the progress bar.
NOTE: Even if you press the button to cancel, your selected disk will already have been erased to make room for the restore image. The data on the disk is already gone.
Upon finishing you will have your disk image file and its data on the disk you selected.