Support Articles
Live Disk Creation
Overview
You can run a full version of Pop!_OS or Ubuntu from a USB drive (often known as a thumb drive, flash drive, or USB stick) in what's known as a live environment. Using a live environment (live disk) is useful for:
- Installing Pop!_OS
- Installing Ubuntu
- Recovering your existing operating system
- Backing up files when you can't boot
- Determining if an issue is caused by hardware or software
- Fixing the boot loader
A live disk can be helpful when doing hardware troubleshooting.
Downloading the ISO
In order to install Pop!_OS or Ubuntu, you must first download the .iso image. This is a disk image with the operating system and installer on it. You can download Pop!_OS here or Ubuntu here.
Verifying the Download
A "checksum" for Pop!_OS images is available on the software download page, and it's recommended to verify your download matches the checksum before trying to install. This ensures you've received the full, complete download and that it's not corrupted.
For Ubuntu/Pop!_OS
Assuming you downloaded Pop!_OS to your ~/Downloads folder, open the Terminal (SUPER + T on Pop!_OS or Ctrl + Alt + T on Ubuntu) and run the following command:
sha256sum Downloads/pop-os_*.iso
Version numbers: This command will list the checksums for all Pop!_OS .iso files. If you're trying to verify a specific .iso version, replace the * with the version name in the .iso filename.
An example of the terminal output to expect is below. The large block of numbers and letters is the checksum to match with the download page. The version of the iso is indicated in the filename. In this example, we are viewing the checksum for the Pop!_OS 24.04 generic version 20 .iso.

For MacOS
Assuming you downloaded Pop!_OS to your ~/Downloads folder, open the Terminal and run the following command:
shasum -a 256 ~/Downloads/pop-os_*.iso
Version numbers: This command will list the checksums for all Pop!_OS .iso files. If you're trying to verify a specific .iso version, replace the * with the version name in the .iso filename.
For Windows
Assuming you downloaded Pop!_OS to your Downloads folder, open the Command Prompt and run the following command:
CertUtil -hashfile Downloads\pop-os_*.iso SHA256
Version numbers: This command will list the checksums for all Pop!_OS .iso files. If you're trying to verify a specific .iso version, replace the * with the version name in the .iso filename.
If the checksum does not match the one on the download page, you may need to re-download your copy of Pop!_OS and ensure it completes downloading before re-verifying it.
Making the Bootable Drive
In order to make the bootable live disk, you must have a flash drive and software to write the Pop!_OS .iso image to the drive. There's a variety of applications you can use to write disk images to a flash drive, but for this tutorial, we'll use the Disks utility for Linux and Etcher for macOS/Windows.
For Ubuntu/Pop!_OS
Press the SUPER key then type 'disks' to launch the Disks application. Select your flash drive in the list on the left.
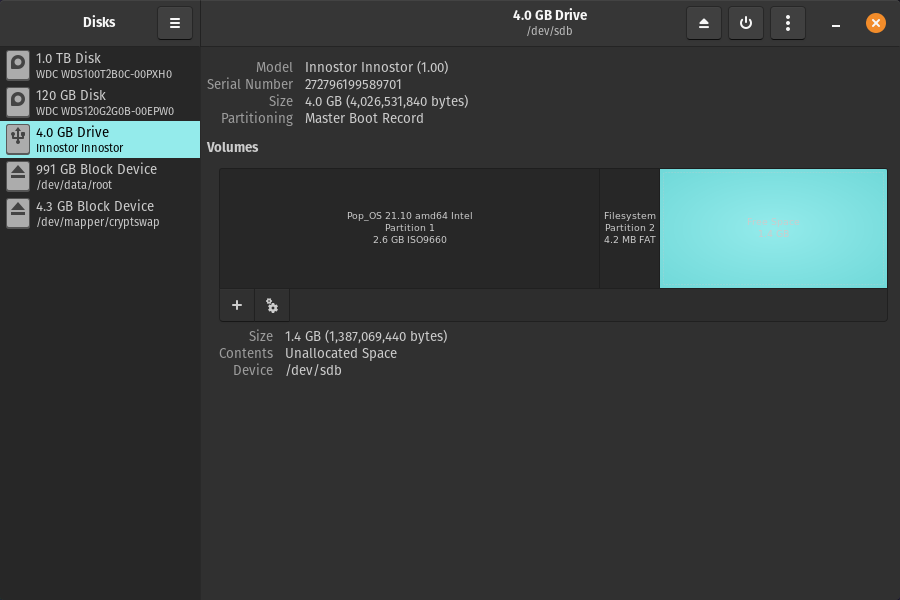
Click on the three vertical dots near the top right of the window, then select Restore Disk Image... from the menu. Next, select the Pop!_OS or Ubuntu .iso file. Finally, click the Start Restoring... button.
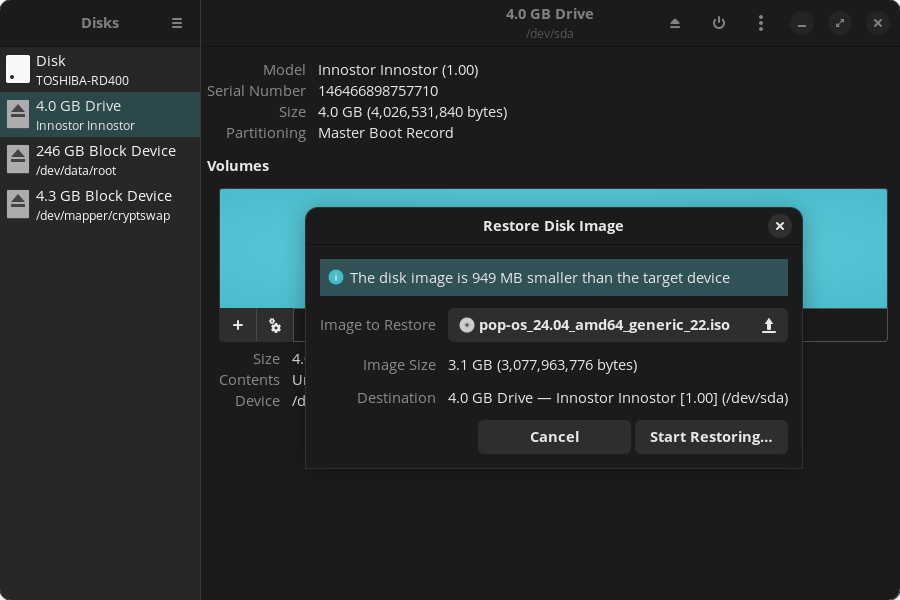
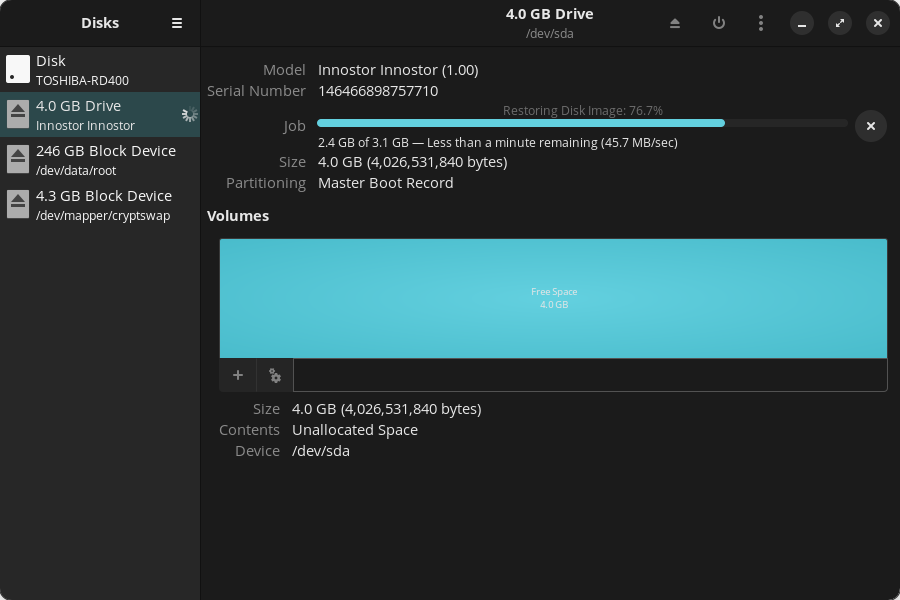
After entering your user password, flashing will begin and a progress bar will appear.
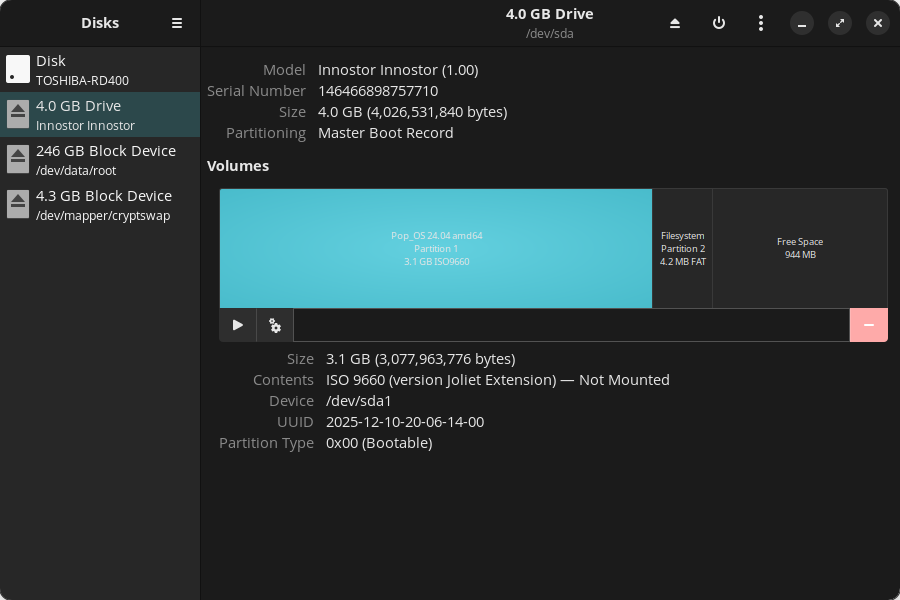
Once the flash is complete, the Pop!_OS partition will appear on the flash drive, as seen below.
Now it's time to boot it up on the machine that you want to install Pop!_OS on!
For Windows/macOS
Etcher is an open source app for Windows, macOS, and Linux that allows you to burn disk images to USB drives. You can download it at etcher.balena.io.
Balena Etcher collects usage statistics by default. You can turn off this data collection in Settings.
Once you have installed Etcher and downloaded the Pop!_OS .iso image, open the Etcher application. You should see something like this:
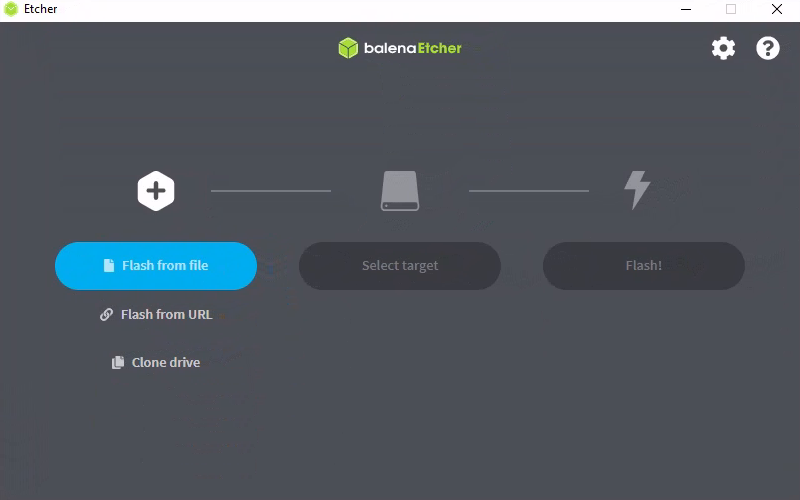
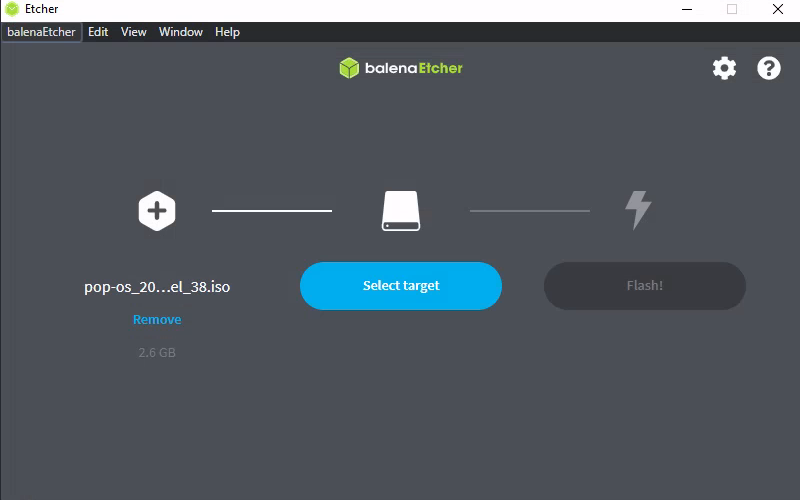
Choose Flash from file and then navigate to where you downloaded the Pop!_OS .iso file (typically your "Downloads" folder). Click on the file then and hit the Open button. On Windows, it should look something like this:

Now click on Select target:
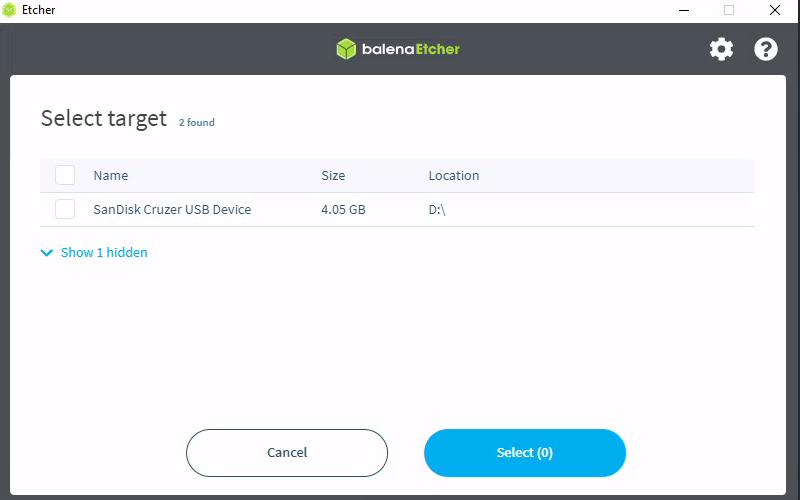
Next, select the drive that you want to use by checking the box next to it. It should only show removable drives by default. After the box for your USB stick is checked, click on the Select button:
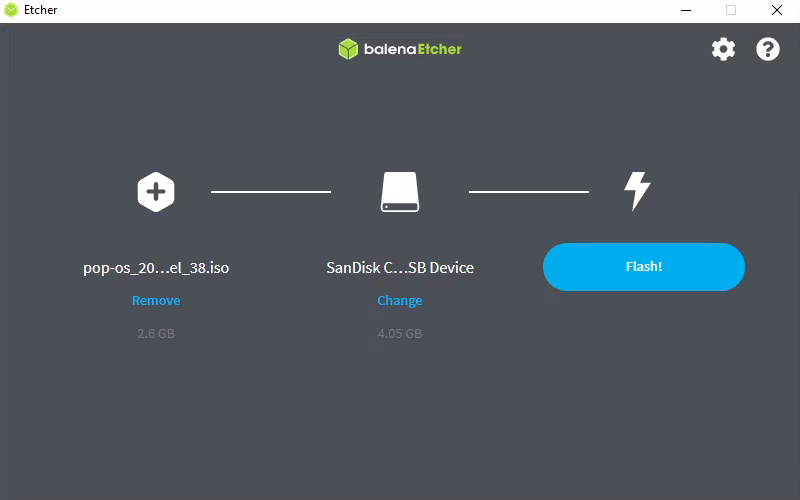
Now hit the Flash! button, and Etcher will start writing to the USB drive.
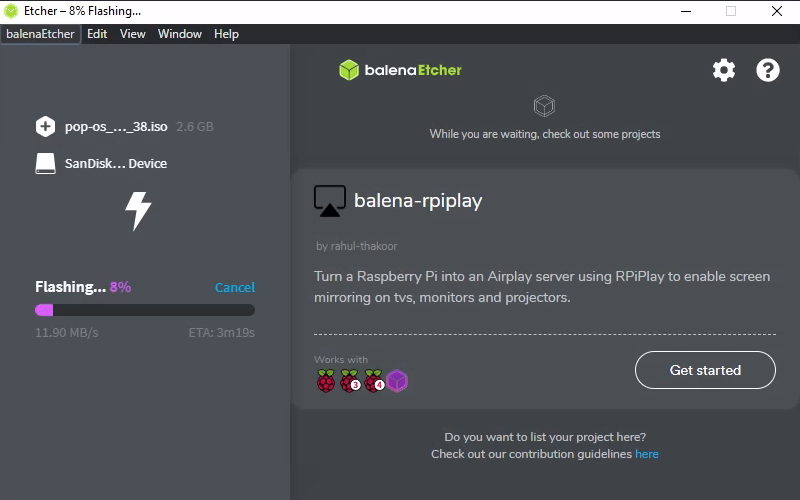
You'll see a progress bar (and some information about other projects by Balena, the company that makes Etcher). Wait for it to finish writing to the USB device.
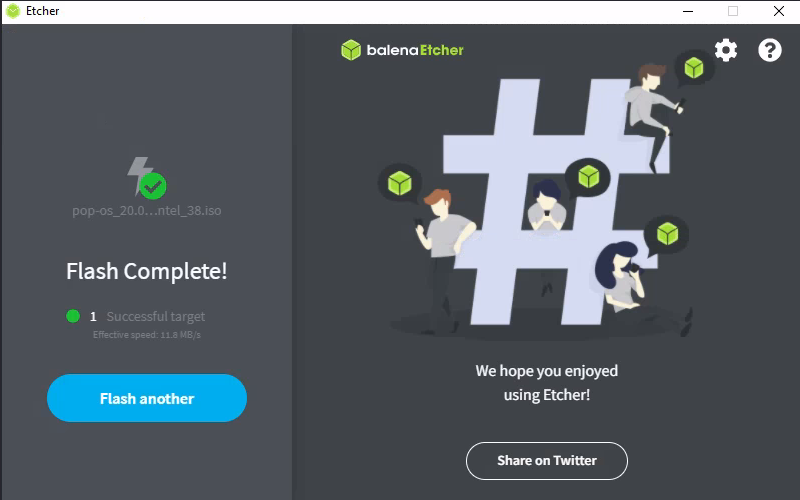
When it's complete, you can just close the app.
Now it's time to boot it up on the machine that you want to install Pop!_OS on!
Booting From the Live Disk
After creating the live disk, insert the USB drive into your computer, then reboot or power on your system. You'll need to tell the computer to boot from the live disk by holding a key right as you power on:
| Firmware | Laptops | Desktops |
|---|---|---|
| Proprietary Firmware | Hold F7/F1/F2 | Hold F12, F8, or F10 |
| Open Firmware | Hold Esc |
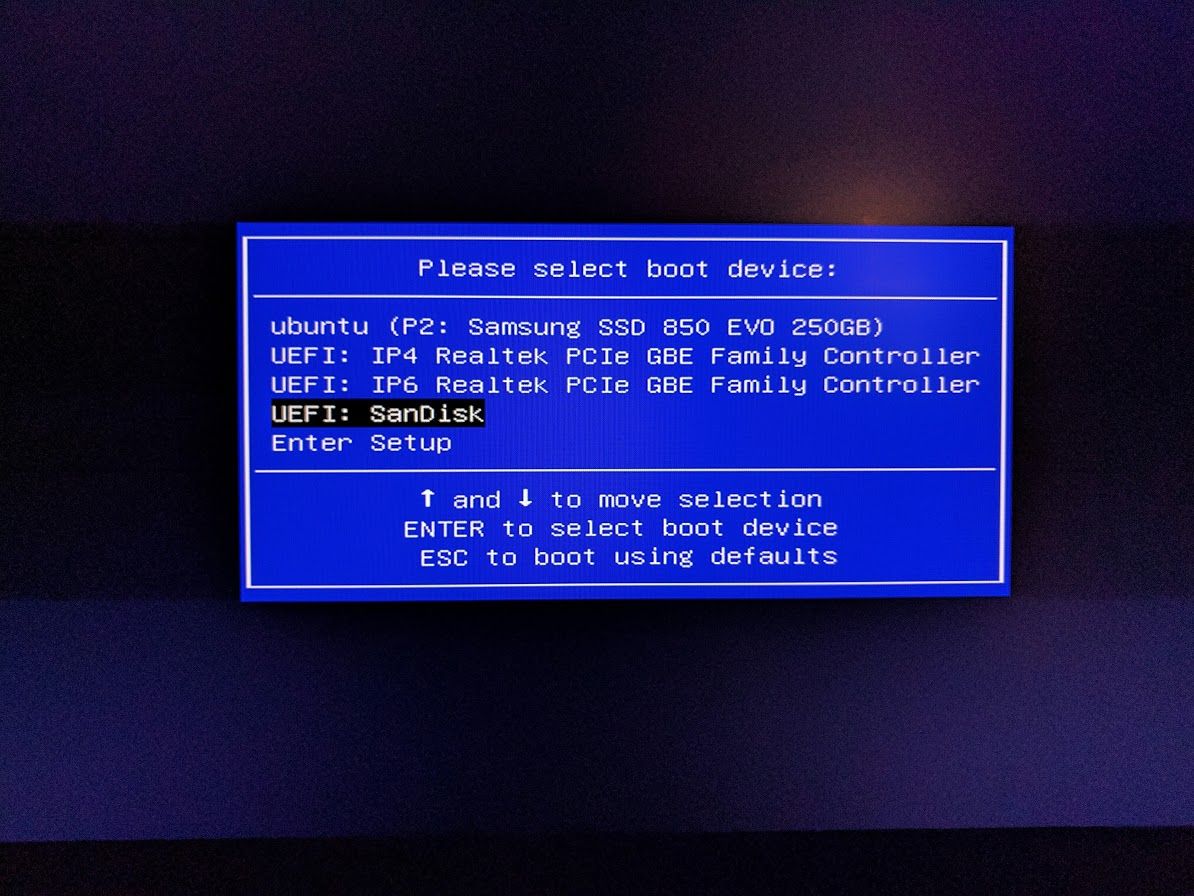
If done correctly, you should see a boot device selection menu, like one of the following images.
On proprietary firmware systems, the menu may look like this (but appearance varies by model):
On Open Firmware systems, the menu looks like this:
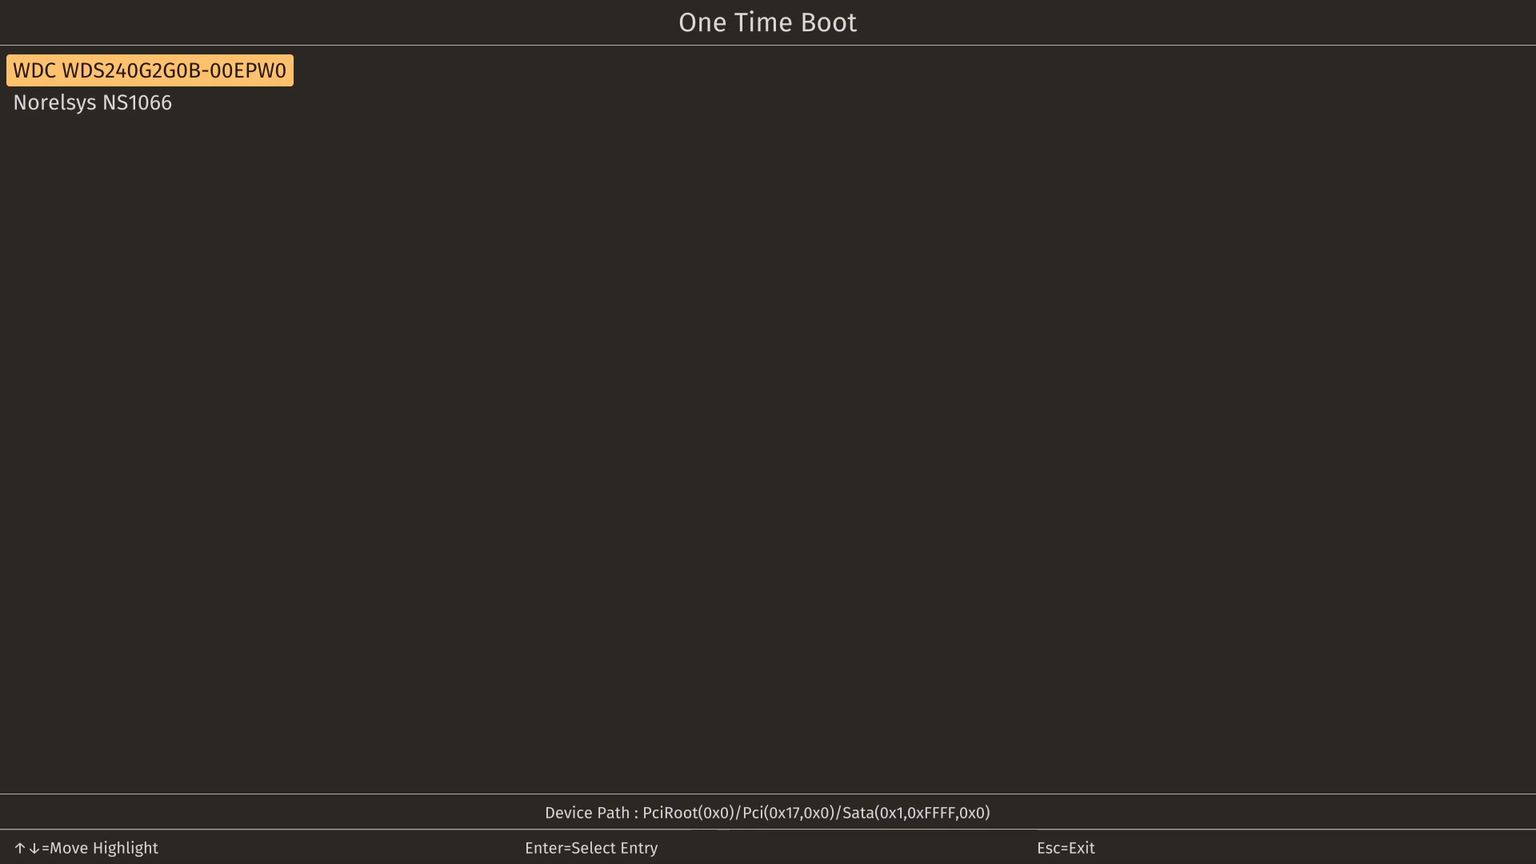
Use the arrow keys to select the USB drive, then press Enter to boot the selection.
Pop!_OS will boot into the familiar Pop!_OS desktop.
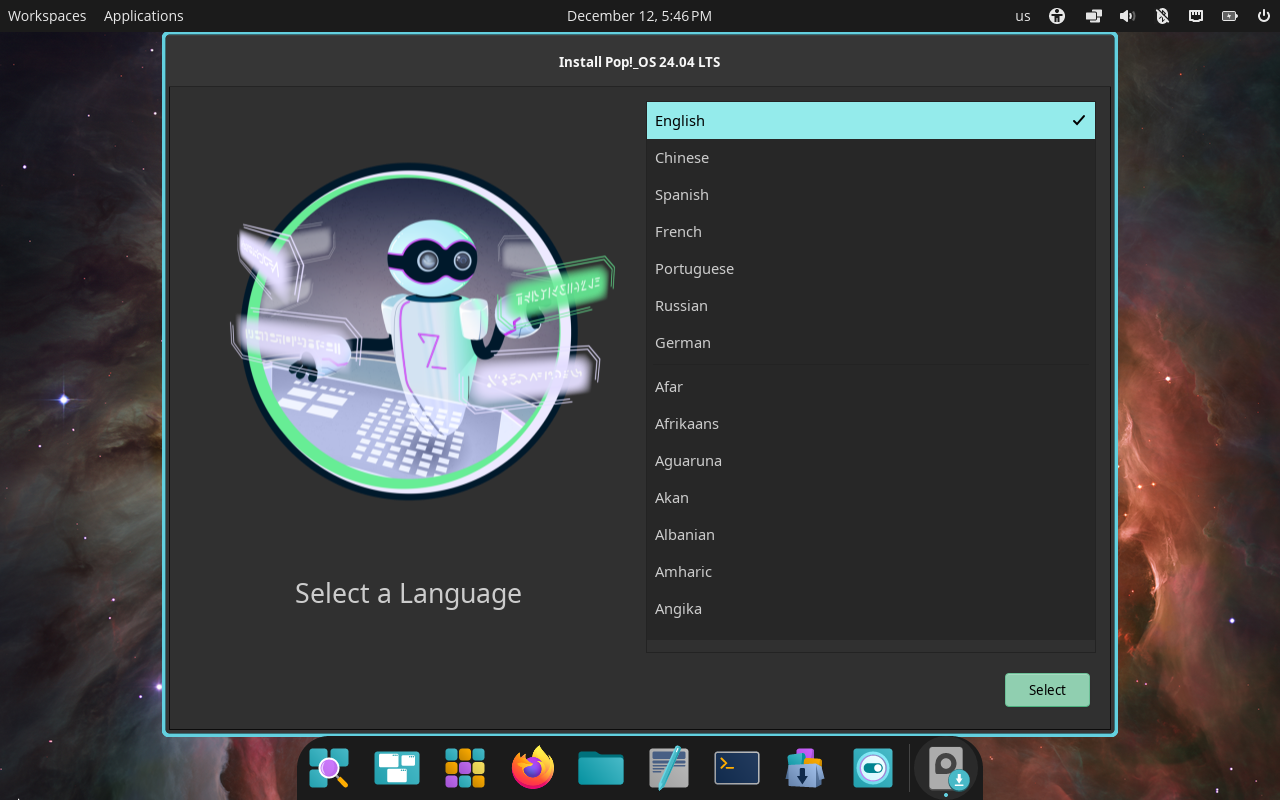
Using the Live Environment
Aside from installing Pop!_OS, you can also use the live environment for hardware testing, restoration/upgrades, and boot repair.
Repairing an Existing Operating System
Since the live environment is a full Pop!_OS installation, it has all the same tools as the normal environment. If the system can't boot normally, you can chroot (change root) into the normal installation using the commands in the Recovery Partition article, which allows you to run commands in the existing operating system to repair broken packages or other problems.
Refreshing the Operating System
A Pop!_OS live disk can also be used to refresh an existing Pop!_OS installation without losing user account information and data in the /home directory. You can find out more about this option in the Recovery Partition article.
Backing Up Files
The live environment will automatically detect and mount most file systems, including those from Linux and Windows. You can then copy files from the disk to another external disk using the normal Files application.