Support Articles
Creating Virtual Machines in Linux
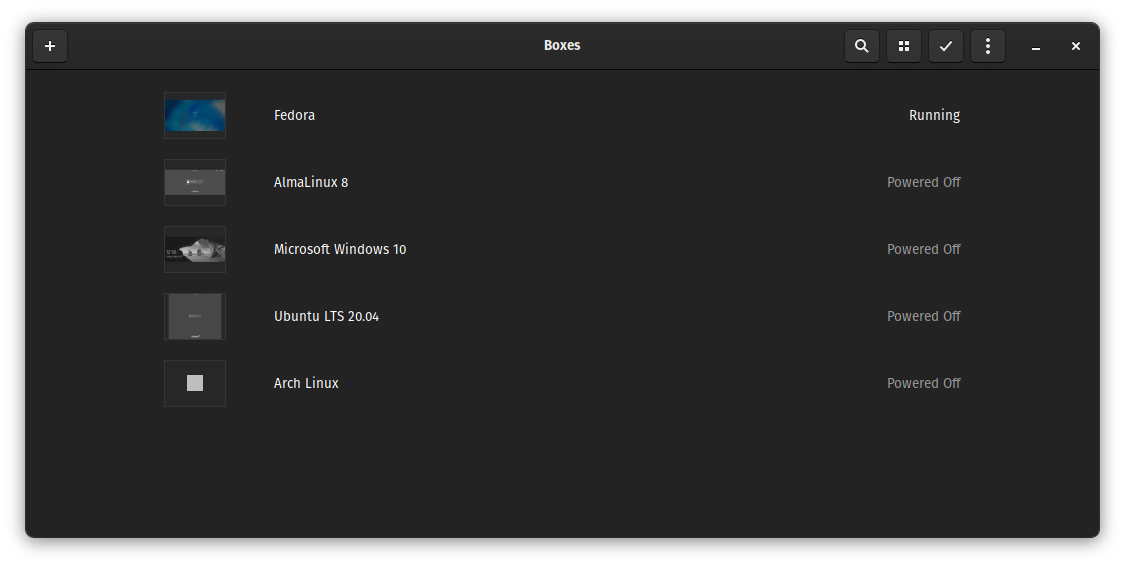
Virtual machines allow you to run other operating systems from within your primary operating systems. This is a great way to run applications that require older software, run applications that require an OS other than Linux, or to try out other operating systems.
This article will cover the GNOME Boxes application for running virtual machines. GNOME Boxes uses the open source libvirt hypervisor, which is the software that manages and runs the VMs.
Set Up
This article assumes you are already running a Linux distribution. Instructions in this guide use Pop!_OS as the "Host" operating system, or the operating system that runs the virtualization software. See instructions below if you aren't running Linux, or would like to install Pop!_OS to make things simple.
- Try Pop!_OS in a VM on your current OS
- Install Pop!_OS on your computer
- Download the Ubuntu ISO
Install GNOME Boxes
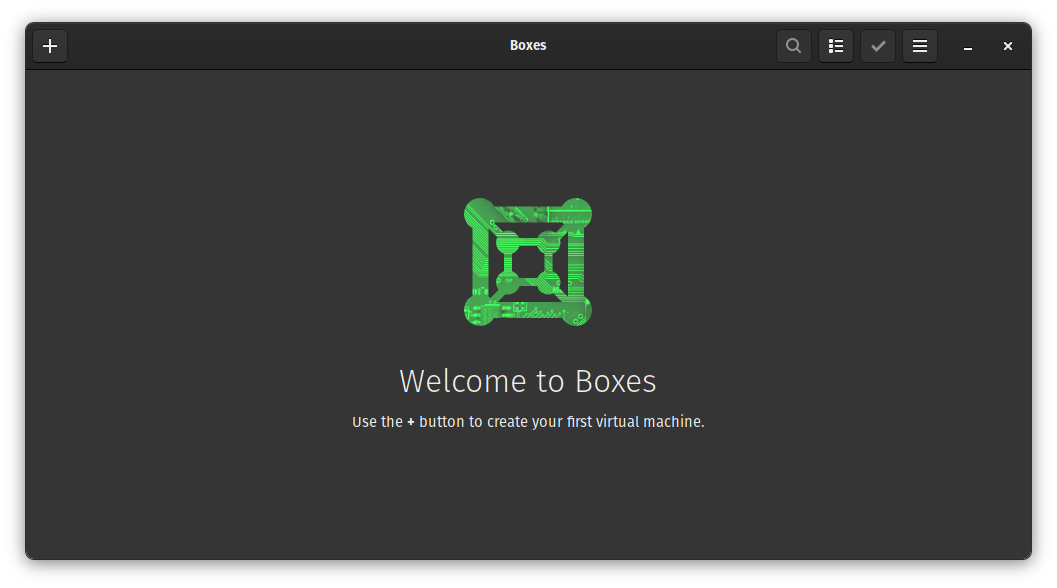
On Pop!_OS, you can install GNOME Boxes from the Pop!_Shop. On Ubuntu, it is available in the Software Center.
Alternatively, on either Pop!_OS or Ubuntu, you can install GNOME Boxes by running the below command in a Terminal
sudo apt install gnome-boxes
For other Linux distributions, GNOME Boxes is likely available in their software store or software repositories. GNOME Boxes is also available as a Flatpak. If your Linux distribution supports Flatpak, you can install GNOME Boxes with the below command.
flatpak install org.gnome.Boxes
Creating a VM
Now that GNOME Boxes has been installed, we can begin to create the virtual machine. To start, open or navigate to GNOME Boxes, then select the + button at the top left. This will open the "Create a Virtual Machine" dialog box.
Selecting the Operating System
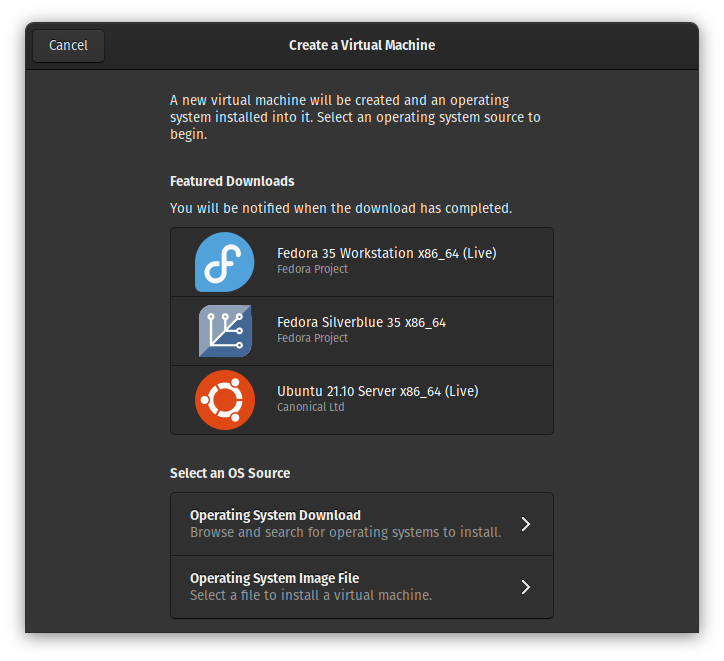
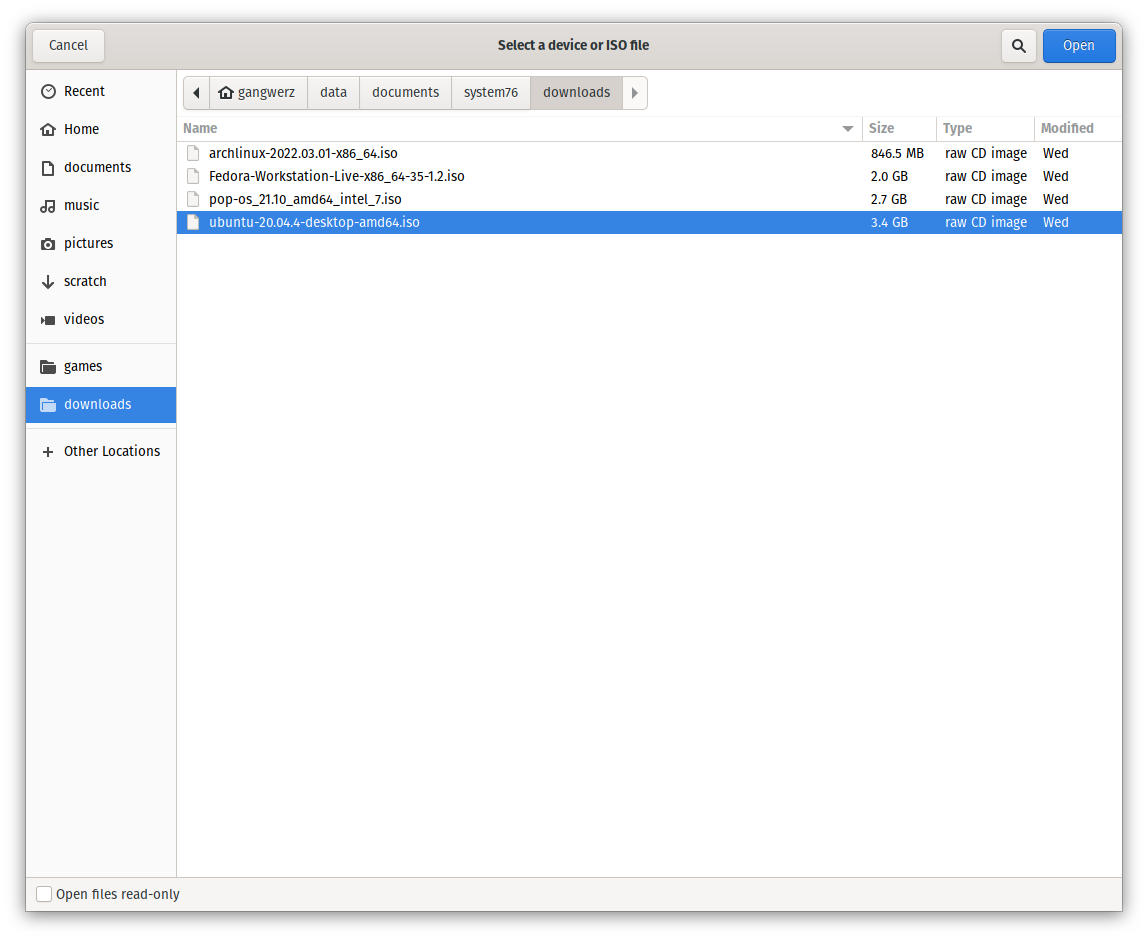
The first step in the VM creator, is to select the OS installer you would like to use. Most often, these installers will be provided as .iso files. To use the ISO file, select "Operating System Image File" at the bottom of the "Select an OS Source" window. Then, a file explorer window will open, and you can navigate to and select your ISO file.
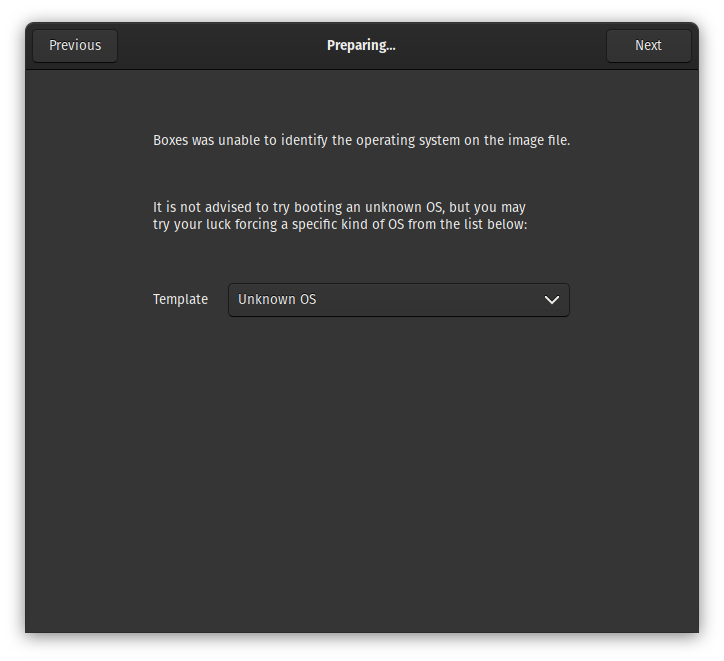
After selecting your ISO file, the following window will ask you to identify your operating system. If your operating system is listed in the "Templates" drop down, you can select it. Otherwise, select "Unknown OS" from the list of templates.
Resource Allocation
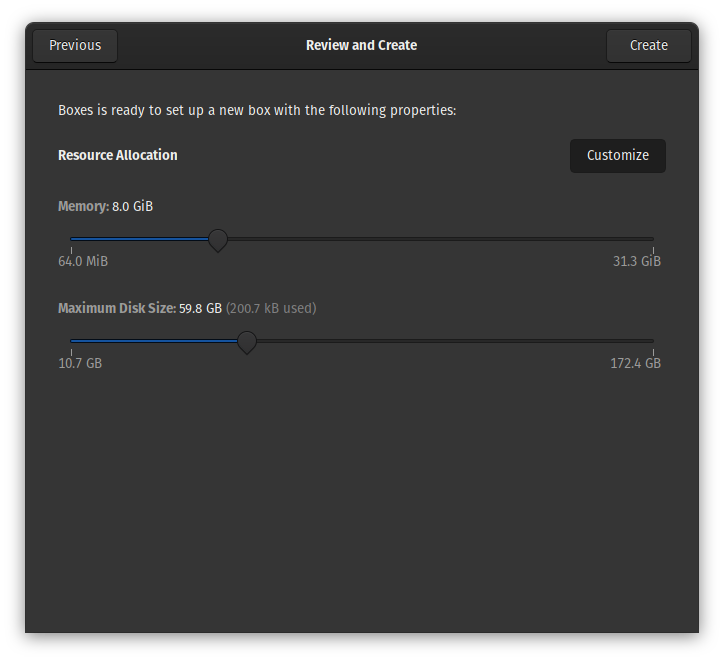
At this point, you should see the "Resource Allocation" screen where you can select the amount of RAM and the disk size for the VM. The amount of RAM and drive space you give to the VM will be dependant on the hardware requirements for the OS you are looking to install.
If you are unsure what values to use, 8GB of RAM and 60GB for the maximum disk size will be enough for most operating systems to install, with some room for growth as you use the VM.
Express Install
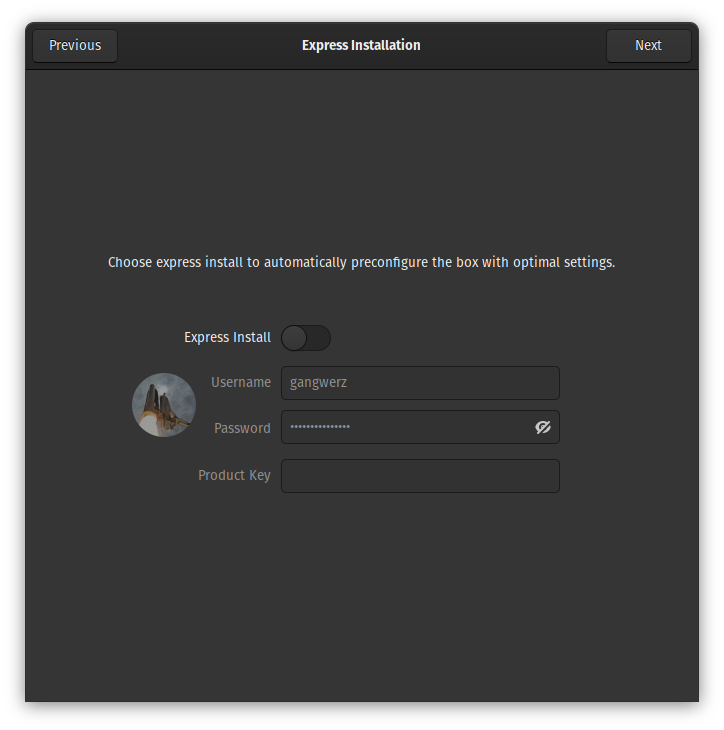
When you attempt to create a VM, you may see a prompt for the "Express Install" feature of GNOME Boxes. You can certainly use the Express Install to expedite the process. However, for this article, turn off the Express Install, then click "Next" at the top right to move to the standard installer set up.
Performing the OS Install
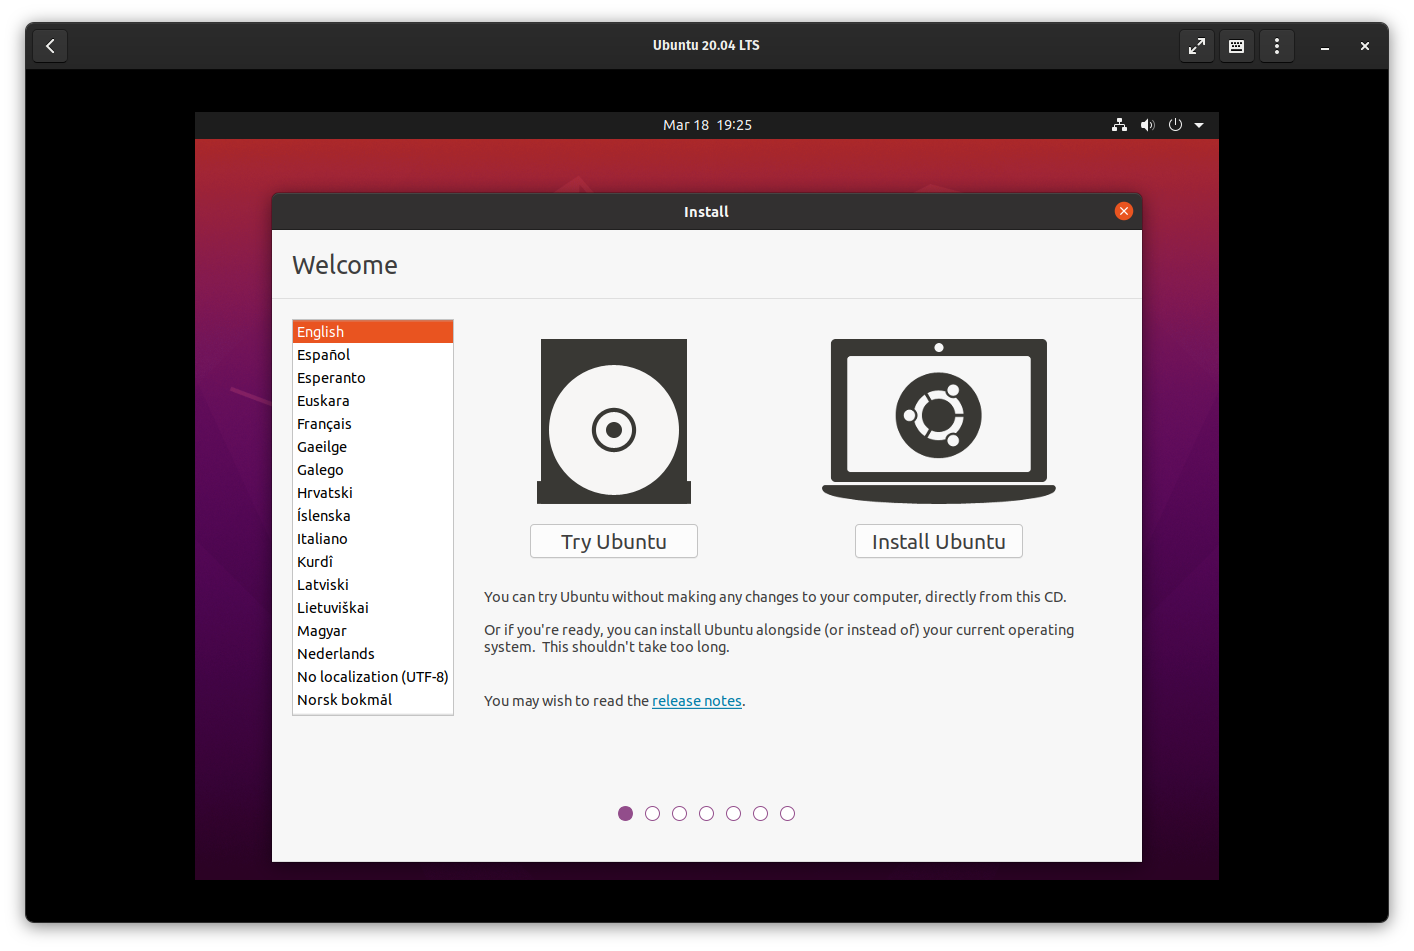
After selecting the resources for your VM, the VM will boot the selected operating system installer. Likely, you will see some odd graphical behavior, such as the black bars shown in the above screenshot. This is because some of the drivers needed for the VM are not installed yet. These oddities can be ignored for now, and we will install the drivers later.
The install process for your chosen operating system will be just like any other install, with nothing VM specific at this time. Proceed through the OS install using one of the install guides linked below, or the OS developer's guide:
Install GNOME Boxes Drivers
GNOME Boxes has some features that require drivers to be installed into the Guest operating system for better performance and to better integrate the VM with the VM software.
Linux Guests
There are 2 drivers needed to get the full functionality out of your Linux VM with GNOME Boxes. The first is the spice-vdagent driver, and the other is the spice-webdavd driver. Both drivers are provided by the Open Source Spice Project.
VD Agent
- Allows the VM screen to resize automatically to match the GNOME boxes window
- Provides ability to copy/paste between the Host and VM
- Support for Dragging and Dropping files from the Host to the VM.
WebDAVd
- Share folders from the Host to the VM.
The driver names may vary by distribution, as shown in the below Arch example: phodav is used instead of the spice-webdavd package name. We recommend referencing your specific distributions documentation for equivalent or alternative driver names
Install the drivers on popular Linux distributions
- Pop
sudo apt update
sudo apt install spice-vdagent spice-webdavd
- Ubuntu
sudo apt update
sudo apt install spice-webdavd
- Fedora
sudo dnf install spice-webdavd
- Arch
sudo pacman -Sy spice-vdagent phodav
Windows Guests
On Windows, there are also 2 drivers that will need installed for all the features of GNOME Boxes to be supported by Windows. These drivers are available on the Spice Project's download page. There are a number of downloads listed in this section, but the 2 drivers we need are the Windows guest tools and the Spice WebDAVd drivers.
Windows Driver Downloads
If you are unable to download either of the above files, right click the link above and select "Save Link As..." and save the file to your downloads folder.
Virtualization Features
Now that the VM is set up, and drivers are installed, the advanced features of GNOME Boxes are now available.
VM Properties Menu
Most of these features can be found in the VM's properties menu. To reach the VM's properties menu:
- Start your VM by clicking on the VM in the GNOME Boxes list.
- Select the ⋮ button at the top right.
- Select "Properties" to open the properties menu.
Copy and Paste
Once your VM has the spice-vdagent or an equivalent package installed on your VM, reboot the VM once to load this driver. At this point, you will now be able to copy and paste between your VM and the Host just like copy and pasting between applications.
Share a USB Device
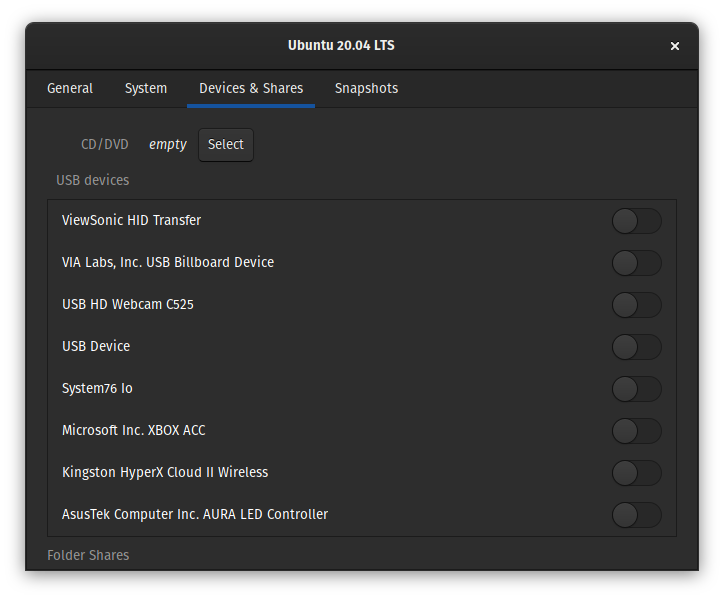
One of the features of GNOME Boxes is the ability to transfer a USB device connected to your Host to the VM. To share a USB device:
- Open the VM's properties menu.
- Navigate to the "Devices & Shares" tab.
- Under the "USB devices" heading, you will see a list of your USB devices.
- Click the toggle to the right of your USB device.
You should now see the USB device disappear from your Host operating system, and appear inside your VM.
Share a Folder
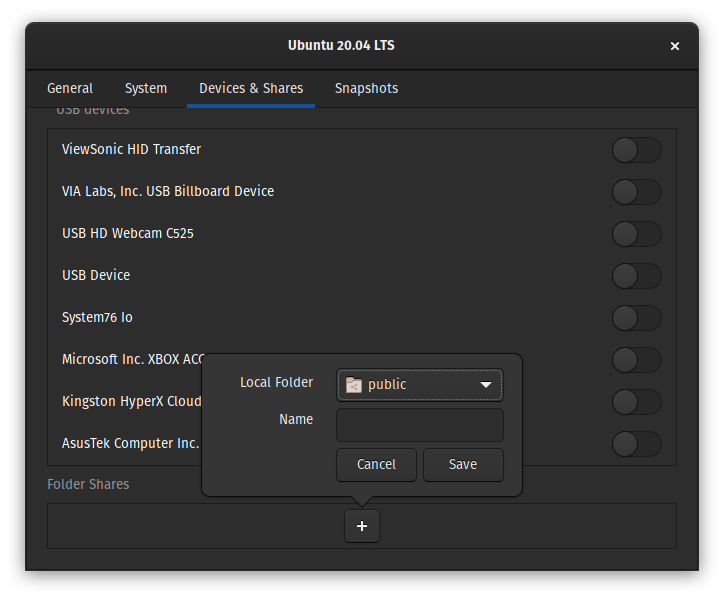
To share a folder from the Host with your VM, you will need the spice-webdavd or an equivelent package installed on your VM.
For this guide, we used GNOME-based Linux distributions, which is used on Pop!_OS and Ubuntu. Accessing shared folders with other desktop environments is possible, but you will need to refer to their documentation for the details.
- Open the VM's properties menu.
- Select the "Devices and Shares" tab.
- Scroll to the bottom.
- Find the "Folder Shares" section.
- Click the + button to show the folder share pop-up.
Selecting the Host's Folder
In this pop-up, the "Local Folder" refers to the folder's name on the Host system. This defaults to the "Public" folder in your Home directory, but can be set to any folder.
- Click the drop down to quickly select important folders on your system.
- If the folder you need isn't listed, click "Other" to navigate to the folder you want to share with the VM.
- Once you have located the folder to share, click "Open" in the top right corner.
Accessing a Shared Folder
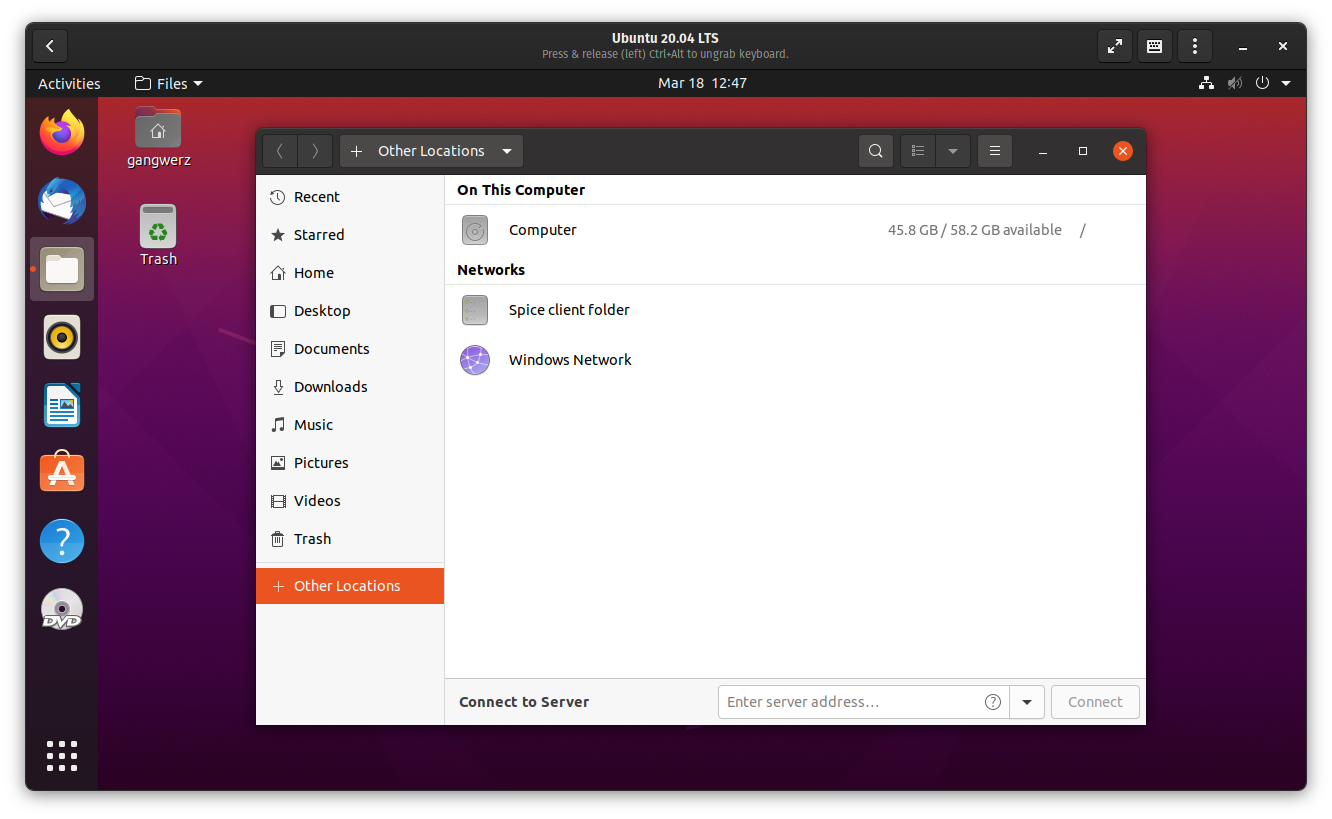
Now that GNOME Boxes is sharing the folder, we can close the properties menu and move back to the VM to access that folder.
- Start your VM.
- Open your Files application.
- Navigate to "Other Locations" on the left hand side.
- You will likely see a spinning loading wheel under "Networks" for a moment, wait for that to finish.
- Find "Spice client folder" listed under "Networks."
- Click on "Spice client folder."
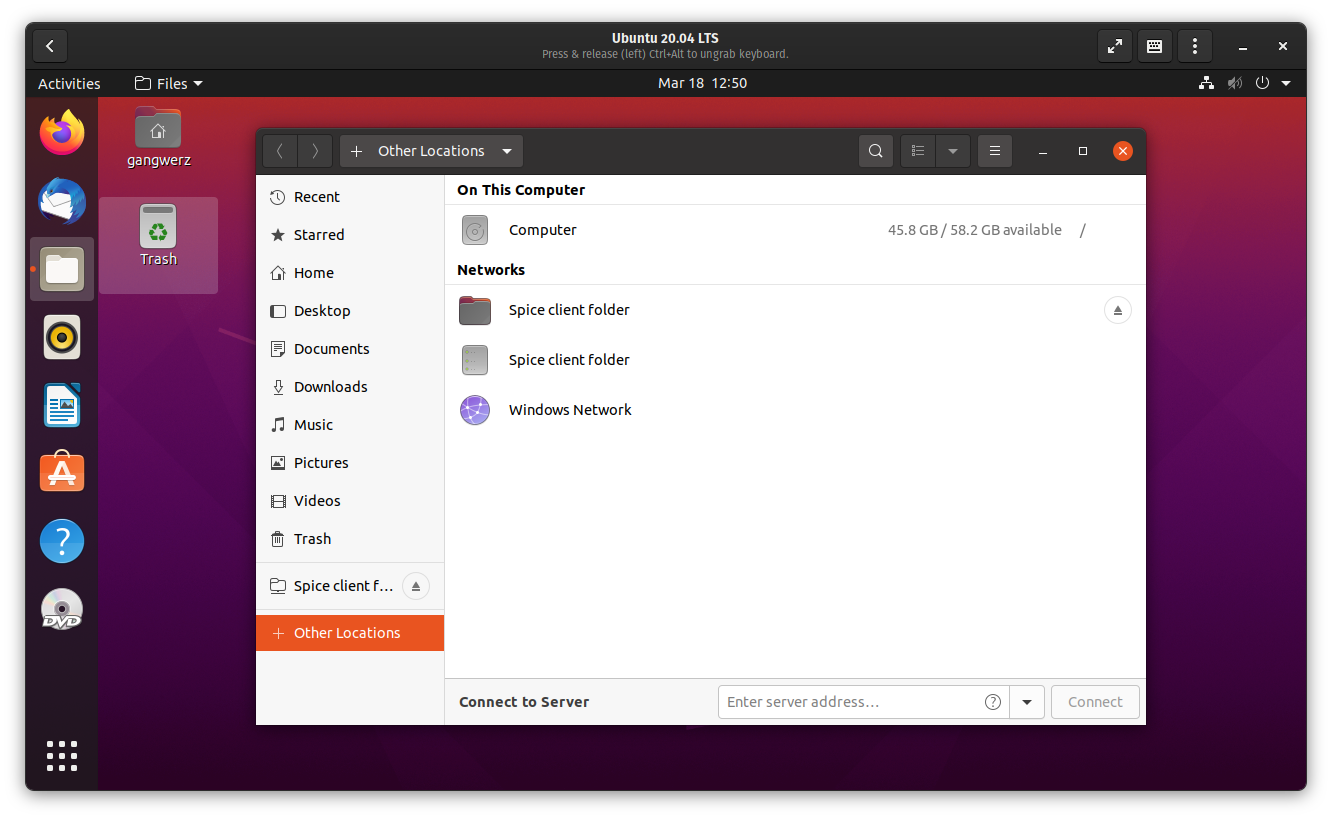
- You will now see a 2nd "Spice client folder" entry with a folder icon (see the photo below).
- Click on the new "Spice client folder" entry and you will see the shared folder listed.
- You can also click the "Spice client folder" item listed on the left hand column.
Snapshots
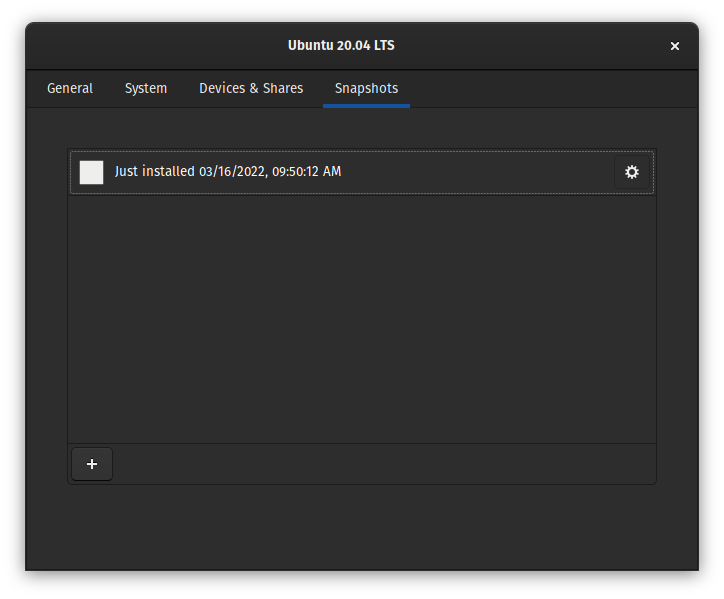
Snapshots are another feature of GNOME Boxes found in the properties menu under the "Snapshots" tab. A snapshot is similar to a backup of your VM. When you take a snapshot of your VM, you are taking a "picture" of the state of the VM at that moment. So, if you take a snapshot, then make changes to your VM that you later want to undo, you can rollback to before the changes.
Taking a Snapshot
- Open the VM's properties menu.
- Navigate to the "Snapshots" tab.
- Click the + icon in the bottom left corner.
Restore a Snapshot
- Click the gear icon next to the snapshot you would like to use.
- Select "Revert to this state."
- Restart your VM.
You will now see all your changes undone, and the VM will be back to the state it was when you took the snapshot.