Support Articles
Data Recovery
This article covers ways to extract and save your data in the event of an OS failure, update failure, or similar situation. If you are having issues reaching your login screen, this article may be helpful instead.
If you can't boot your installed OS
If you are not able to boot into your installed OS, then we will want to boot from a live disk. If you have Pop!_OS installed we can use the Pop!_OS Recovery Partition.
Creating the live disk (Bootable OS)
We can use this article to create a live disk of Ubuntu if you aren't using Pop. For more information about accessing Recovery see here. For Ubuntu, refer to this article.
We do not need to chroot into the installed OS to back up data, only mount the OS drive. Once this is done, we can install the software used for the backup process: Deja Dup (see below).
Connect to the Internet

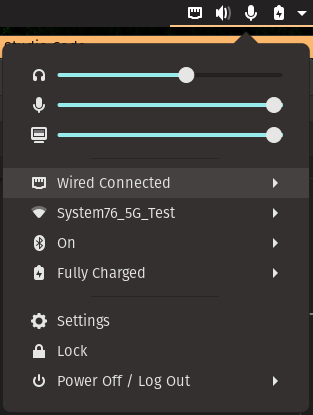
Use the top-right menu (as shown above) to connect to your Wi-Fi once booted into the live disk.
Mount the installed OS
Once connected to the Internet, open Firefox and access the bootloader article. Then copy and paste the encryption commands (if the OS is encrypted) and the mount commands.
NOTE: If you own System76 hardware and/or have a System76 Account, this will also allow you to access Support Tickets, copy/paste commands from those tickets or upload log files, etc.
Software
Once the drive is mounted, we can install software to back up files.
Deja Dup
Déjà Dup is a popular, straightforward backup option. It can be used to back up user data locally, remotely, or to a cloud server. It can also be set up to run automatically on a regular basis.
Rsync
rsync is a popular command-line tool to copy data while keeping the permissions. It is useful if the system is powering down or if you want a command-line tool to copy the files.
rsync -avxP \
/path/to/directory/to/backup \
/path/to/directory/for/storing/backup
NOTE: Depending on your ISP/Cloud Provider or physical location. Upload speeds may vary or even be throttled. If possible, connect via Ethernet for a faster, more stable connection when transferring files.
Installation
To install Deja Dup, search for it in the Pop!_Shop, Ubuntu Software or run this command:
sudo apt install deja-dup
Once Deja Dup is installed, it will be labeled as "Backups" in the Activities overview.
Selecting Data to Backup
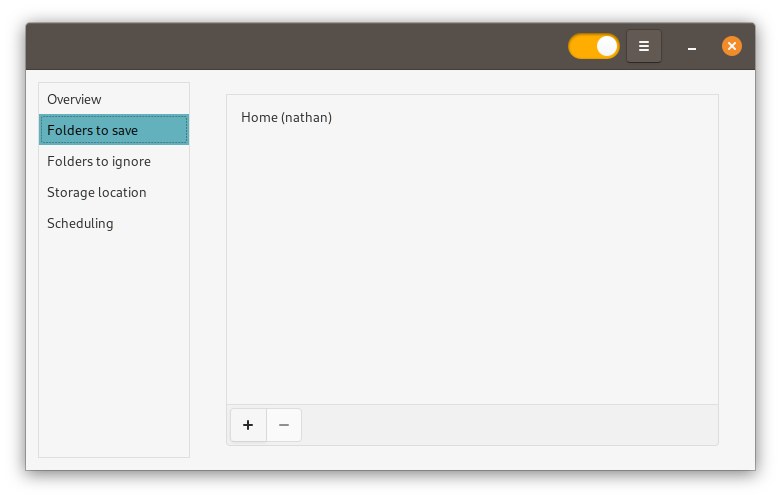
With Deja Dup (Backups) open, you can select the folders you wish to save or ignore using the pages listed on the left. By default, Deja Dup will backup your entire home directory, which includes your Documents, Pictures, Music, and Videos folders. It ignores your Downloads folder and any items in the Trash. Use the plus (+) and minus (-) buttons as needed to modify both categories.

Choosing a Backup Location
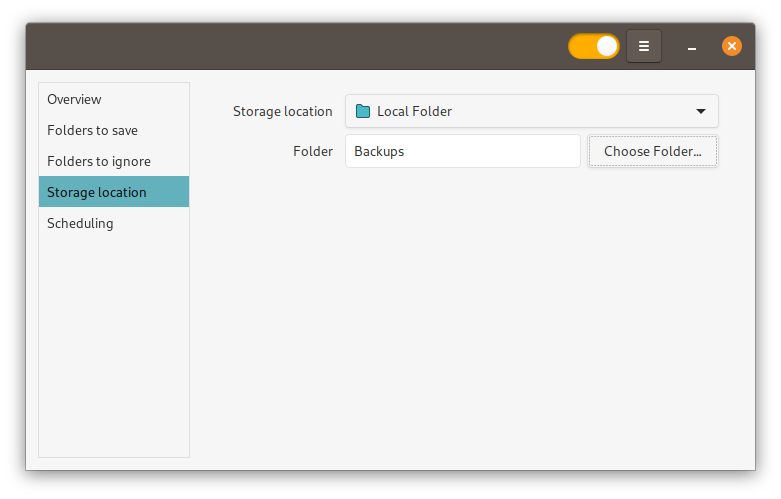
On the Storage location page, you can configure the location where your backup will be stored.

Hardware
An external or internal drive can be used as a local backup location.
External
The specs below offer an idea on what to look for when purchasing external storage:
- USB 3.0/2.0
- Match your OS drive size or larger. If you have a 1TB drive, purchase a 1TB drive or a 2TB+ drive, if you want to store multiple backups.
Internal
If your system included a second drive beside the OS drive, we have this article that goes over setting up the drive to auto-mount once the OS is either repaired or reinstalled. If we have the installed OS mounted in the live disk open the Files application then go to Other Locations to access the secondary drive. Unless you've changed the name of your drive, System76 systems ship with secondary drives labelled "Extra Drive" or "Extra Drive #."
Restoring Your Data
Once we have our data backed up we can reinstall the OS. This article goes over the usual install process whether you're intalling from Recovery or a Live Disk:
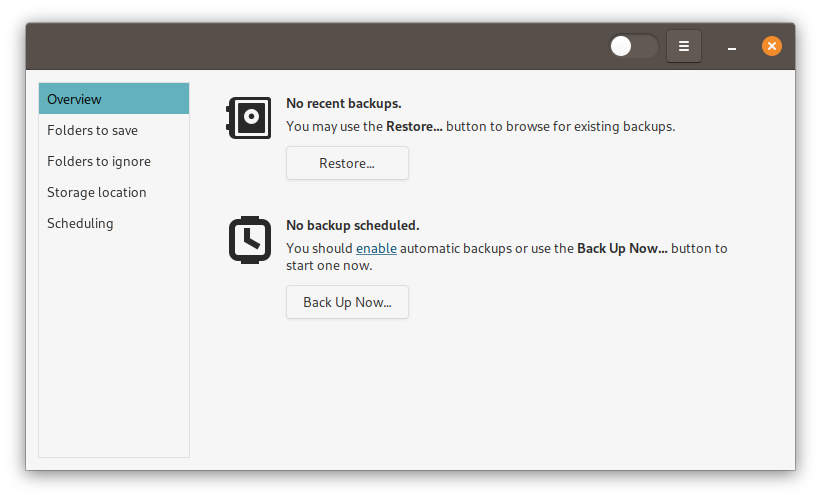
Now that we reinstalled the OS we can start restoring our data. To restore your data with Deja Dup, select the Overview page, then click the Restore... button. This will allow you to select the location containing the Deja Dup backup folder, and will copy the data from the most recent backup to its original location.

If the System Doesn't Power On
Refer to your models service manual for removing the drive(s). Once you have moved the drives containing your data to another system, you can transfer them to an external hard drive (or other location) with the steps in our backup article.
What if the Drive is the Problem?
If signs are pointing to the drive itself being the issue, and your files are corrupted, or no longer accessible, a data recovery service may be the only viable option. If that is the case, remove the drive, and stop using it until it can be taken to a data recovery site. Continued use of the drive may exacerbate bad sectors, or overwrite existing, partially retrievable data.
NOTE: Data recovery services are not guarantees of data recovery, and may be cost-prohibitive for some users. System76 is not a data recovery service. Nor do we partner with any. A data recovery service is not a substitute for having robust backups. However, your drive manufacturer may provide data recovery services as part of your service agreement or warranty.
Future Steps
Now that we have our data, and a clean install of the OS, let's prepare for if this issue happens again. It's good practice to set up scheduled backups. Our backup article can help.
NOTE Good practice to prevent data loss is to ensure that any important files are backed up in at least three (3) places. Two (2) copies on-site, and one (1) copy off-site. This off-site backup could be through a cloud storage solution, or a drive that's kept at a relative's house, or in a safety deposit box.